Workflow Custom Actions
‘Workflow Custom Actions’ feature is designed to provide permission to ‘Execute’ or ‘Performe’ a ‘Custom Action’ created for the execution of a workflow with Custom Action Node. The Custom Action feature is executed based on certain conditions, set up to pull out relevant databases in order to perform an update, send bulk emails, and execute drip marketing or any manual email campaigns. This feature is accessible through the ‘Access Control’ section in ‘Admin Panel‘ to either all users or a specific group of users based on their user names, roles, and departments as configured in the Saphyte CRM-Access Control section.
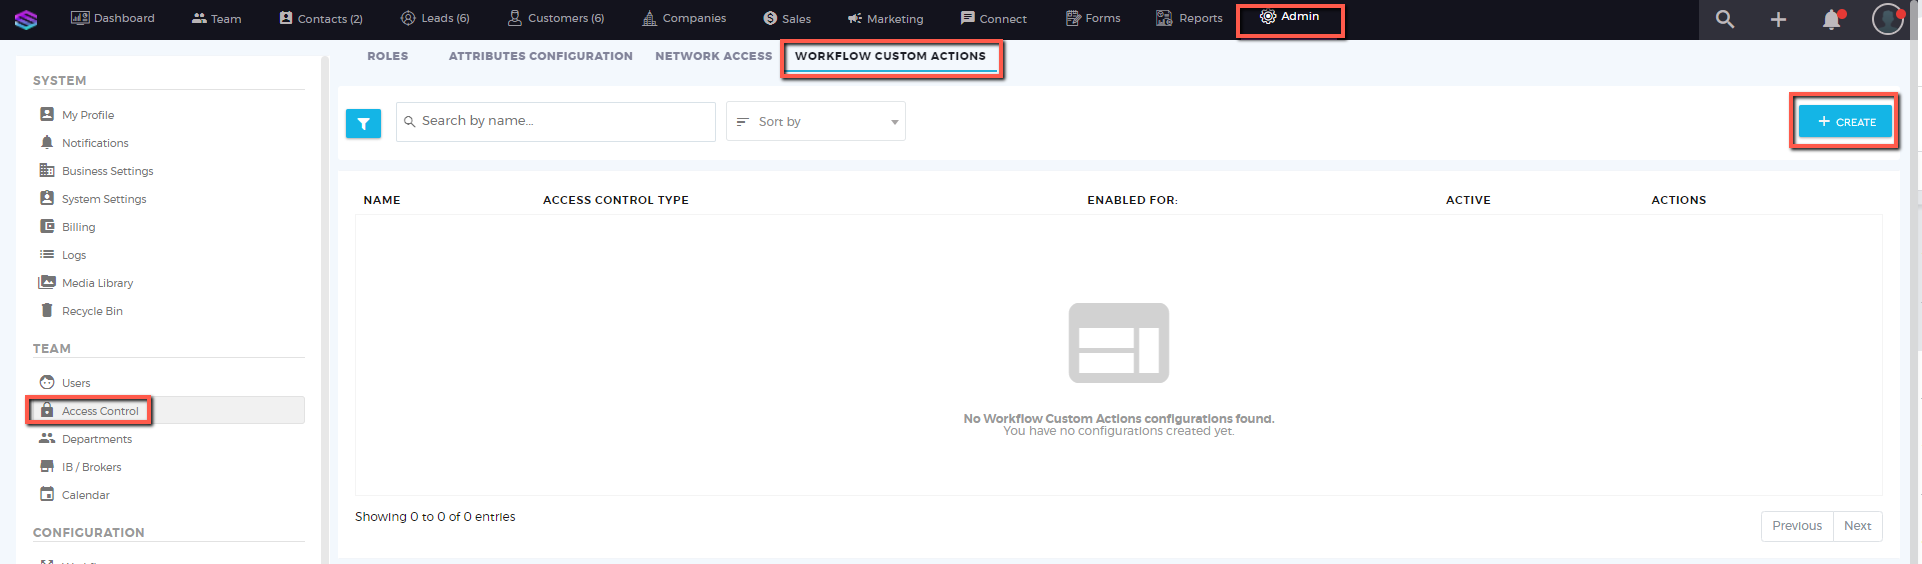
Below are the steps to provide access to the Workflow Custom Actions.
1. On the Admin Panel, navigate to the Team Menu > Access Control. You will be directed to the next page, select Workflow Custom Actions, and Click on 
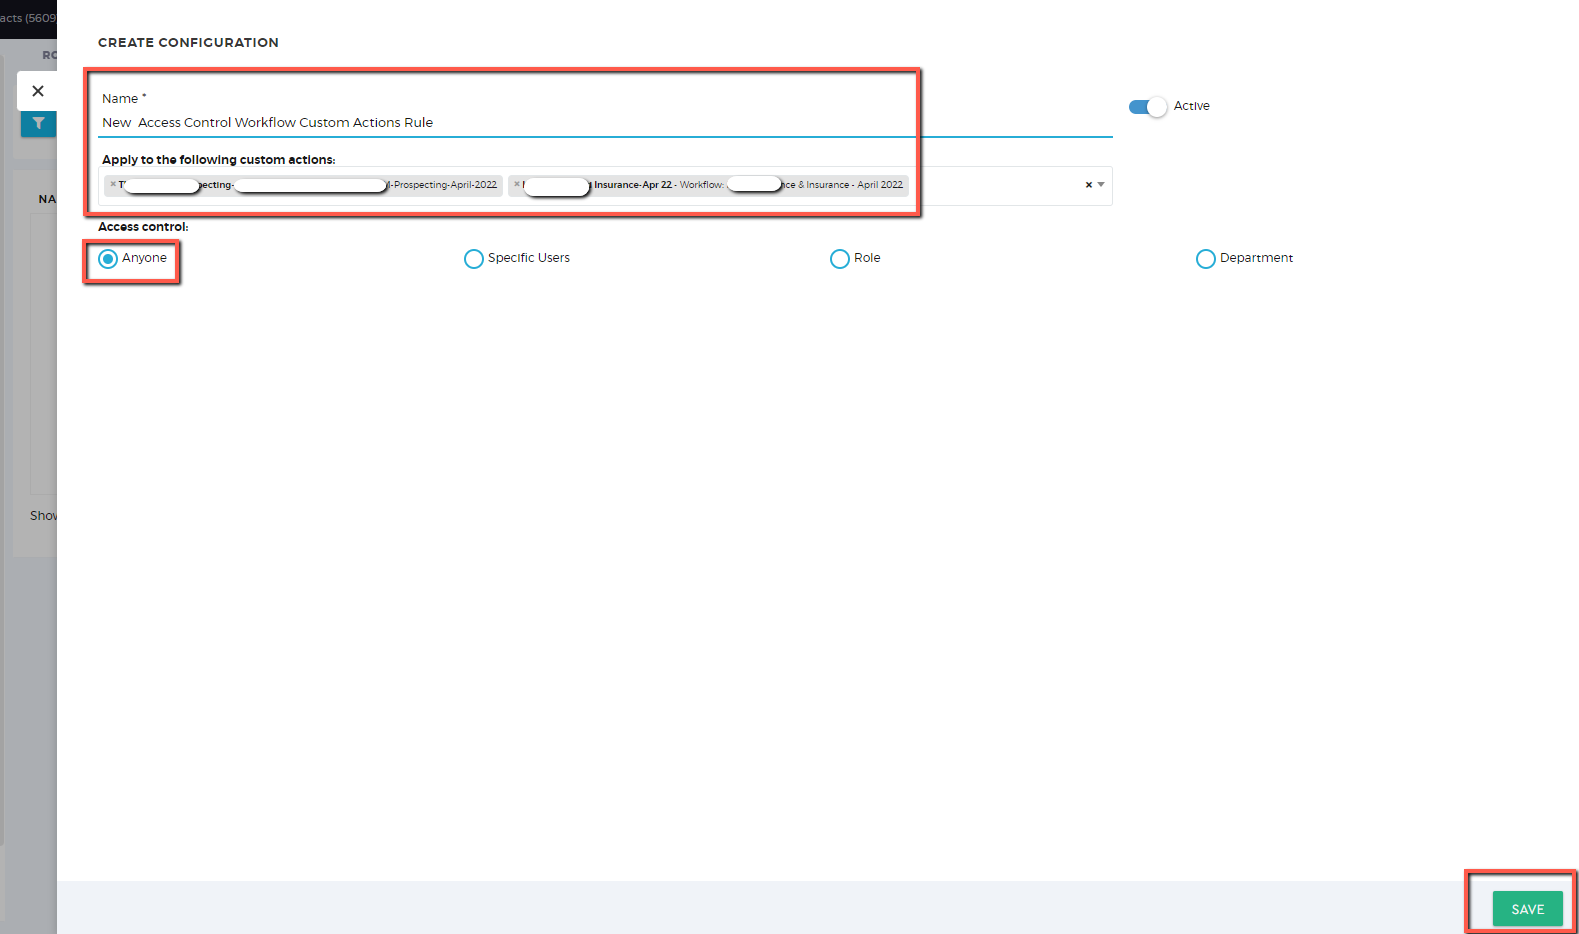
2. We can configure Access Control for the Multiple Workflows or any specific workflow (only one) to either ‘Anyone’ (All users), ‘Specific Users’, ‘Role’, and ‘Departments’. Updates done in the Access Control should be saved via the  button.
Workflow Custom Actions Access Control (Anyone)
Add Workflow Custom Action-Access Control ‘Name‘, Select Custom Action from the drop-down to which Access Control needs to be configured. Activate the Access Control and select any one option through the radio button as required. For assigning Access to All users ‘Anyone‘ radio button is to be selected and the selection is saved through the ‘Save’ button.
Workflow Custom Actions Access Control (Specific Users)
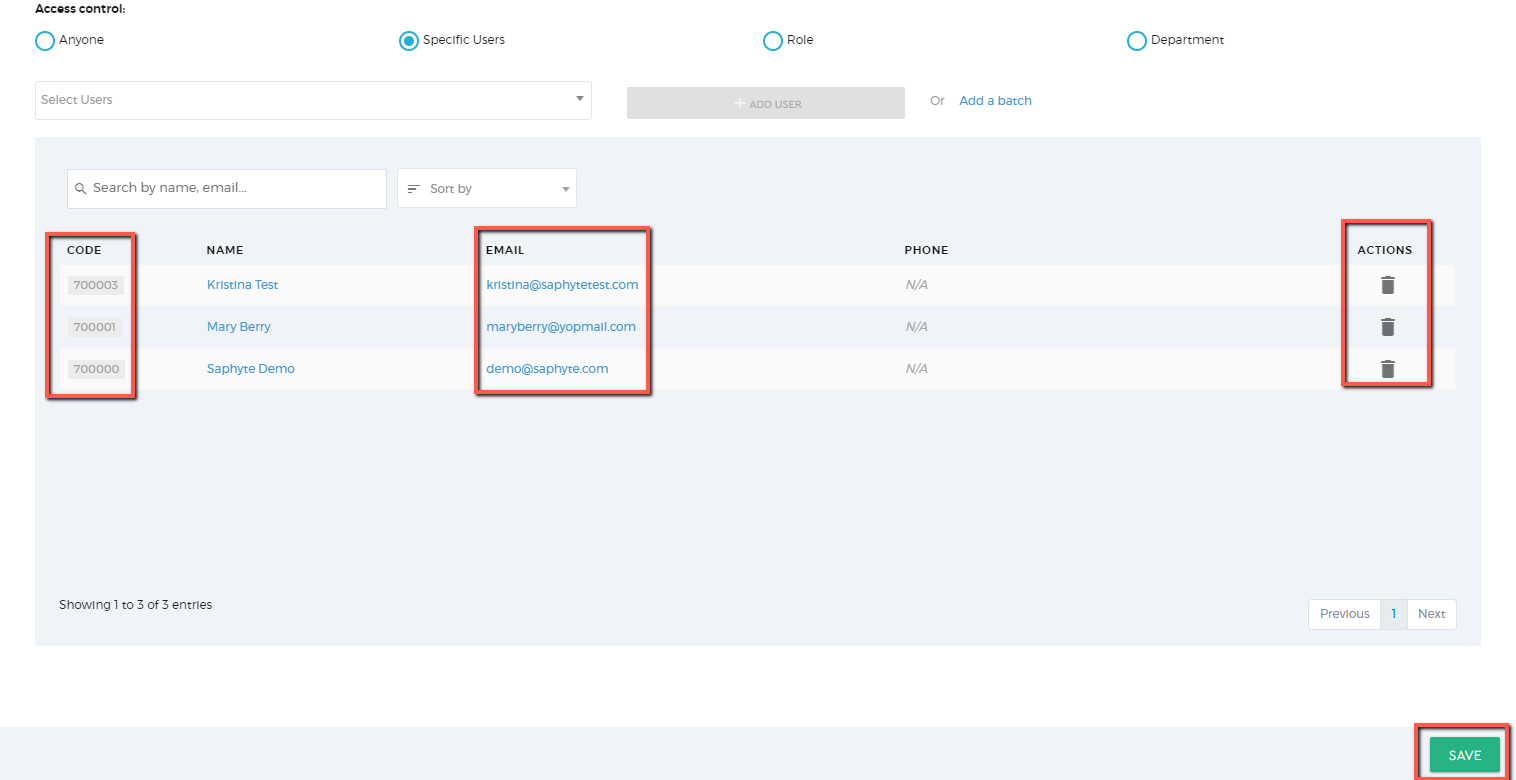
Add Workflow Custom Action-Access Control ‘Name‘, Select Custom Action from the drop-down to which Access Control needs to be configured. Activate the Access Control and select any one option through the radio button as required. In order to confgure Access for desired group of users, select ‘Specific Users’ radio button. Select user name from the dropdown and Click on ‘+ADD USER’ button and make sure the selection is saved through the ‘Save’ button.
The user added through specific user radio button appears below the selection criteria along with a numeric ‘CODE’. There is also an option to delete the ‘Actions’ access through Delete Icon
.
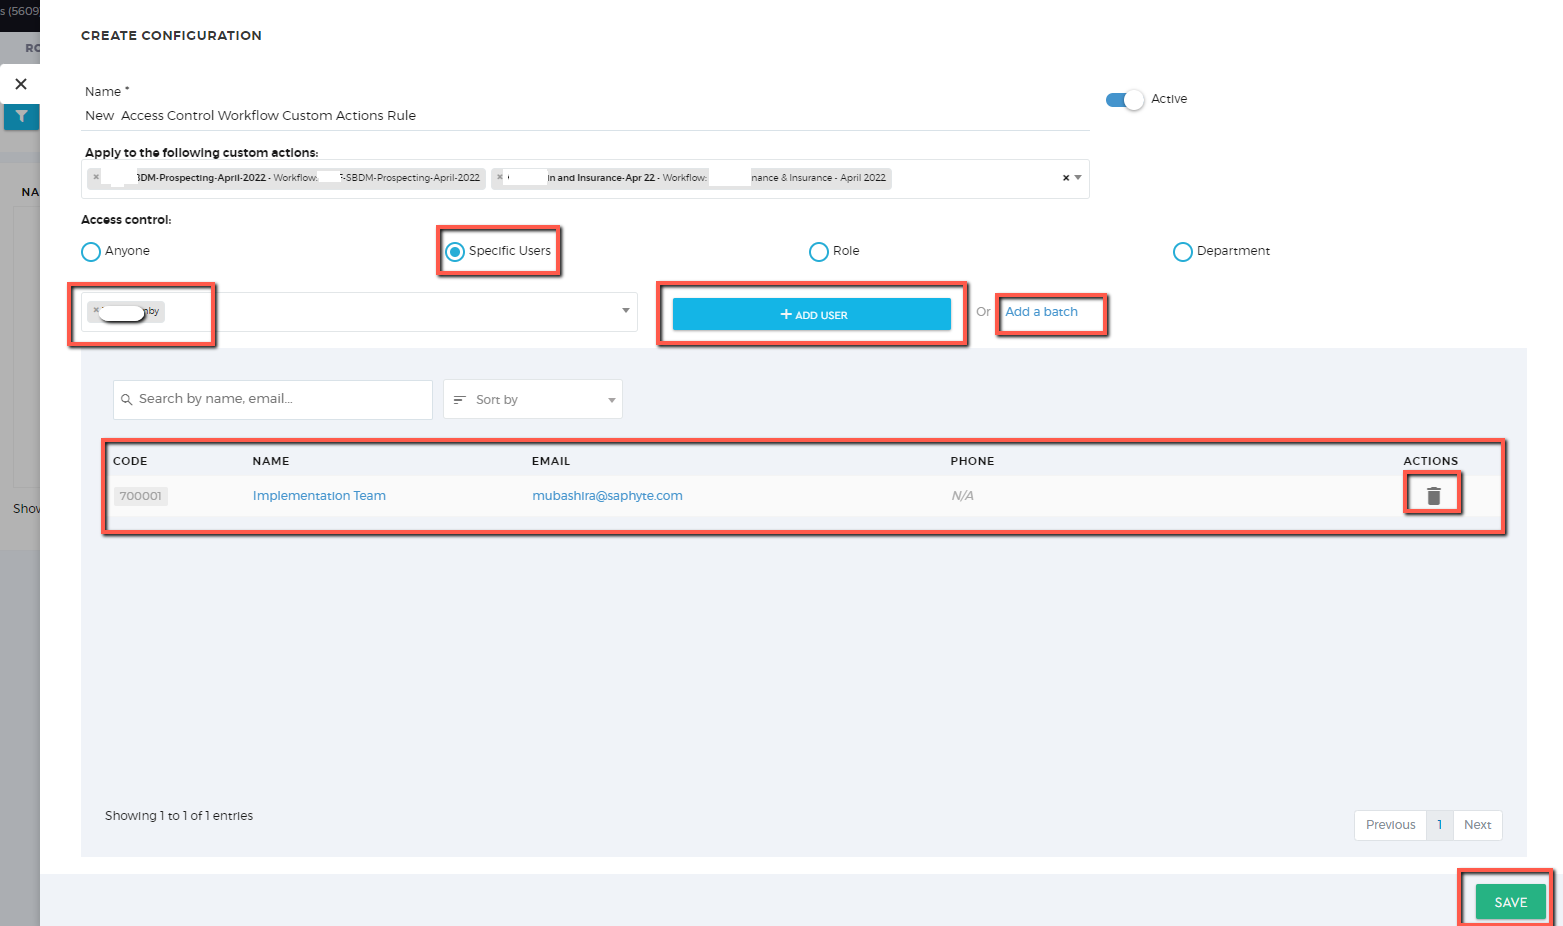
You may also add users through ‘Add a Batch’ option on the basis of desired logic that you may like to include in the rule.
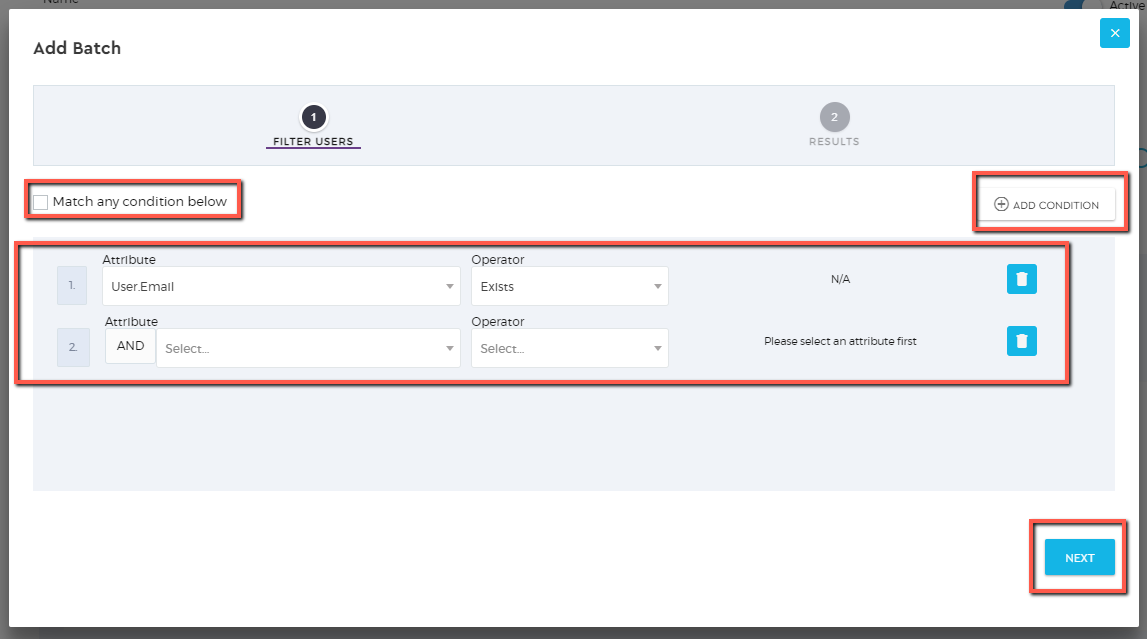
The results for the batch matching the condition sleceted will appear in the ‘RESULTS’ tab, Click on ‘Add ( ) Users’ button to assigne access control to the batch of user fetched through the condition.
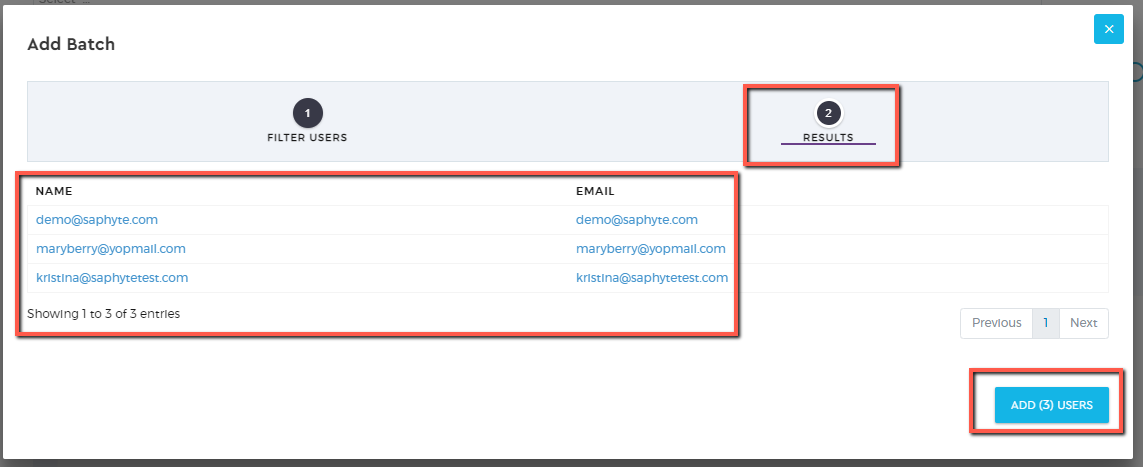
Upon adding user batch, it will appear in the Workflow Custom Actions Access Control Configuration window with a list of users along with user ‘CODE’ number and an option to delete action via delete icon. Click ‘SAVE’ button at the bottom of the window to save the batch.
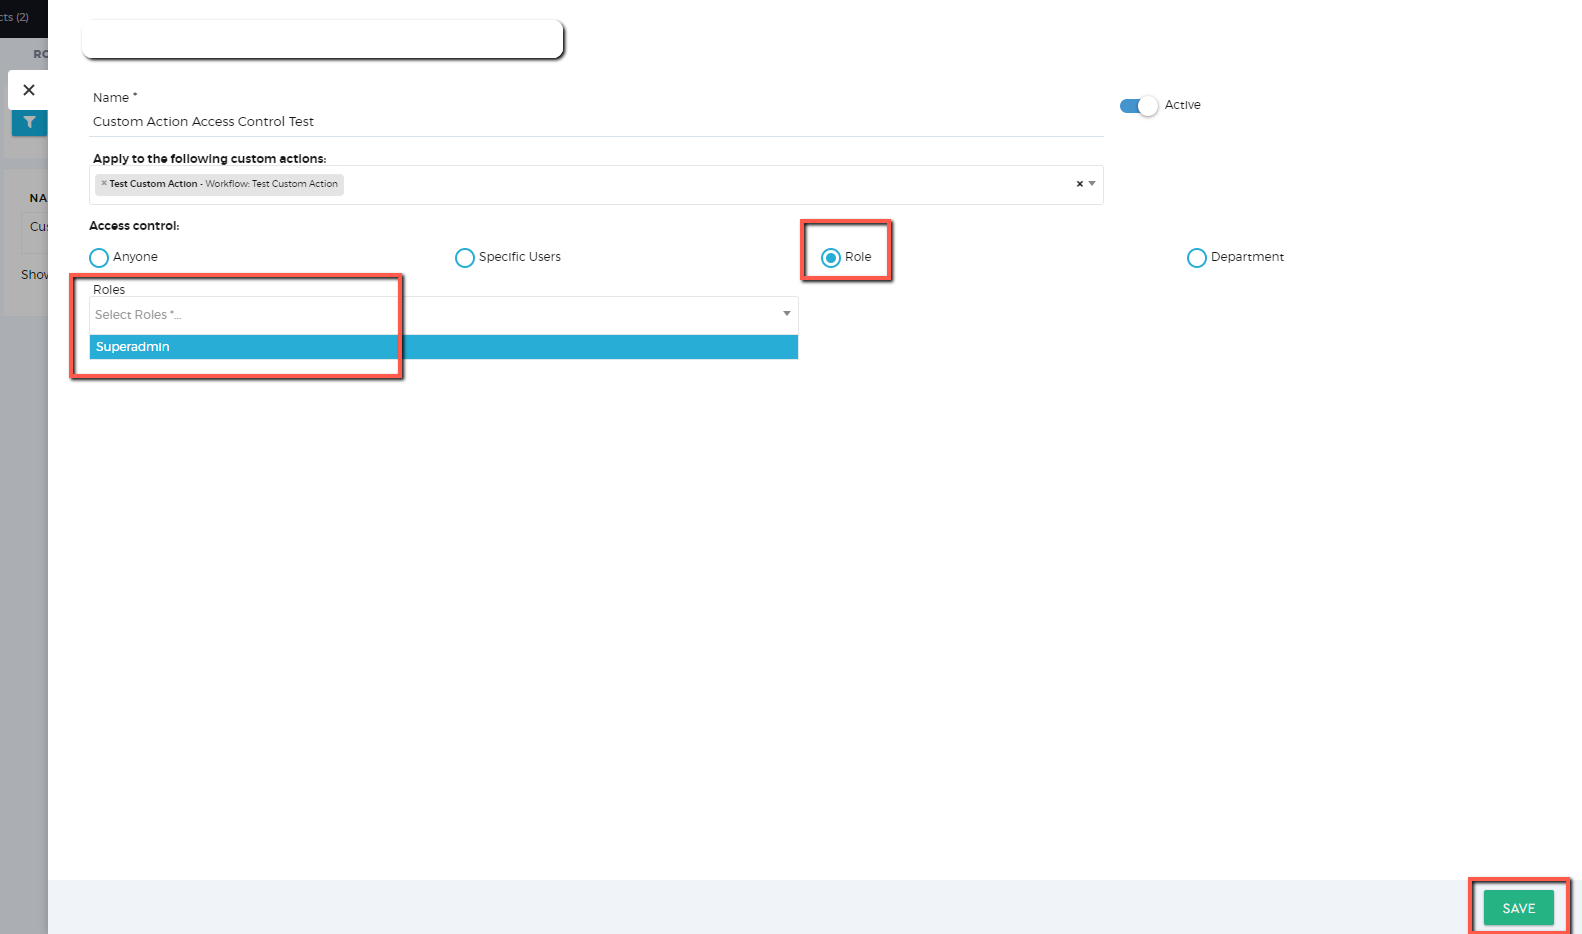
Workflow Custom Actions Access Control (Role)
In order to assign workflow Custome Actions Access Control to a ‘Role‘, select ‘Role’ radio button, select role from the dropdown and click ‘SAVE’ button to save updates.
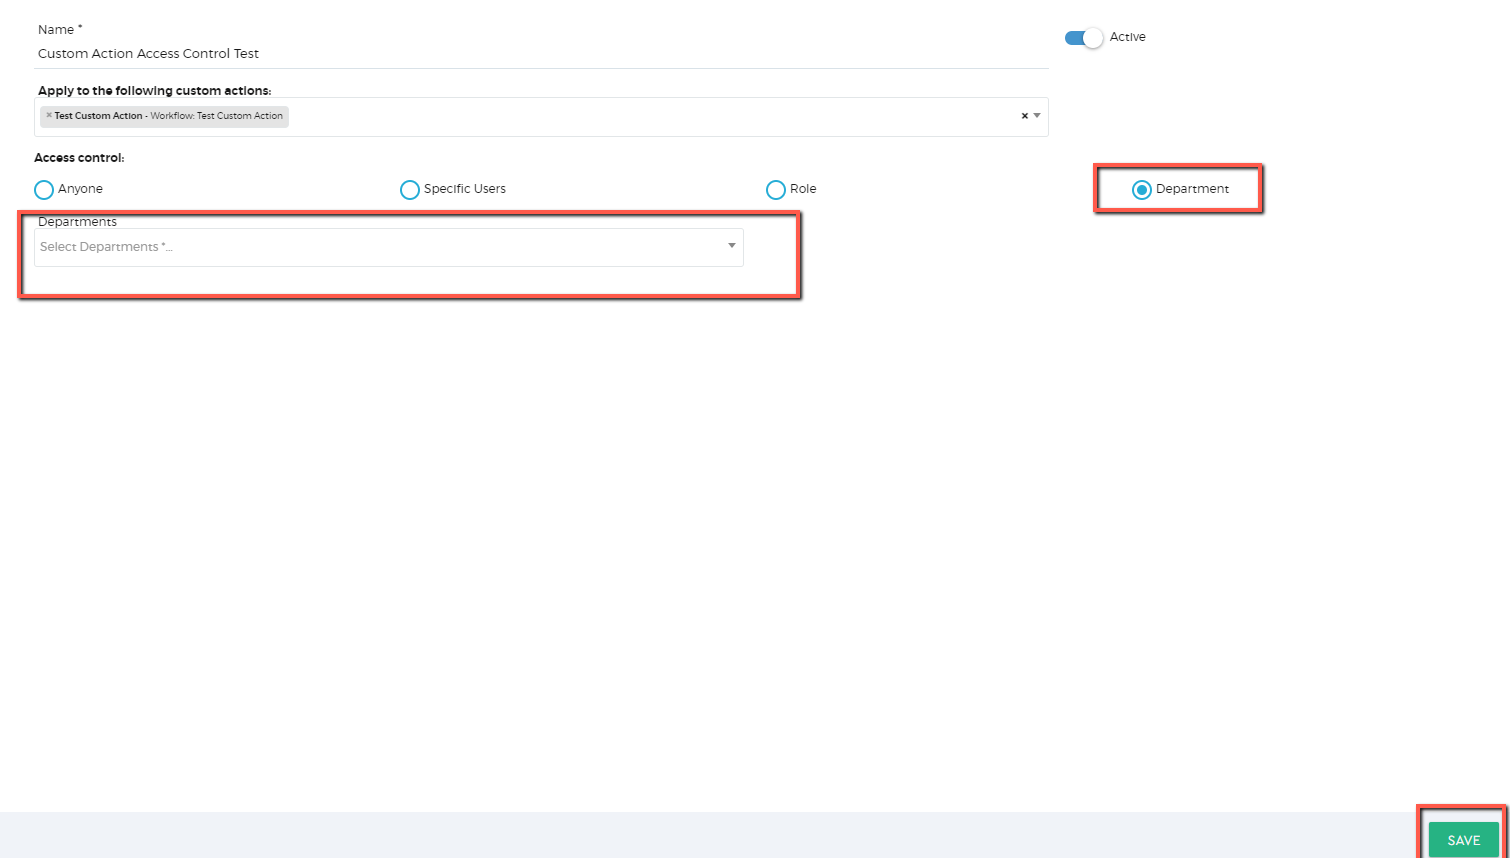
Workflow Custom Actions Access Control (Departments)
In order to assign workflow Custome Actions Access Control to specific ‘Departments‘, select ‘Departments’ radio button, select departments from the dropdown and click ‘SAVE’ button to save updates.
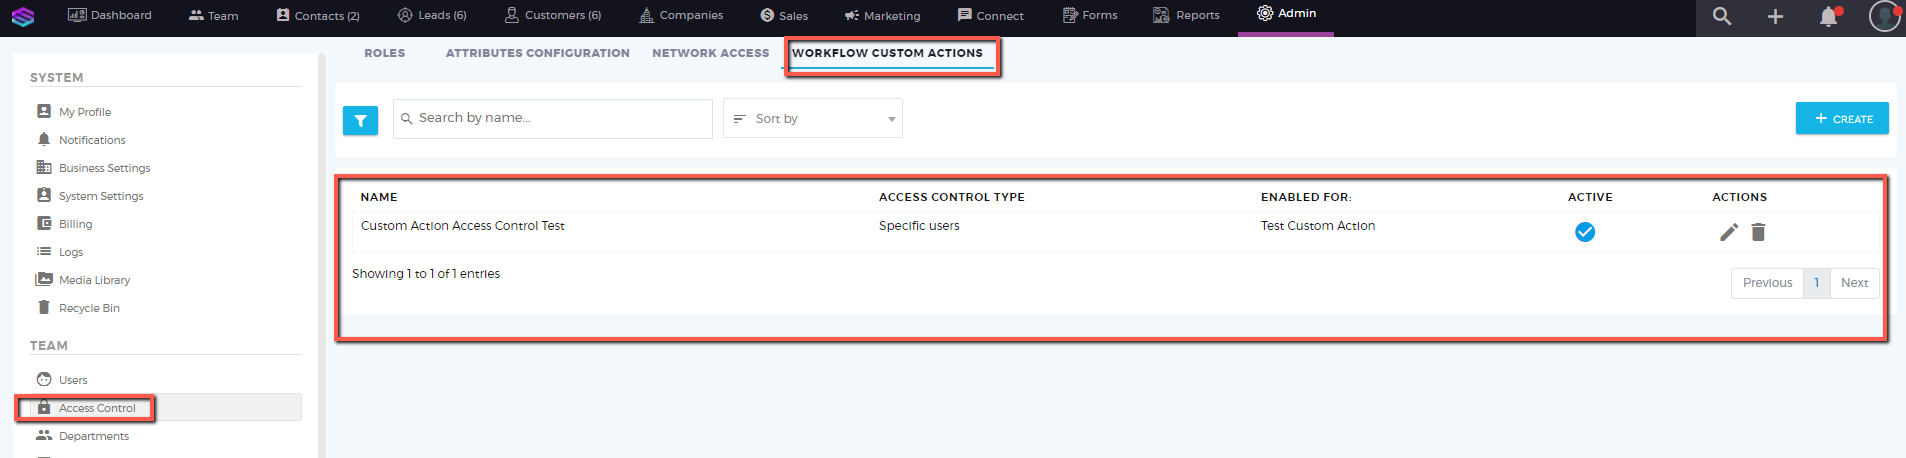
Successful Configuration
Successful configuration of Workflow Custom Action Access Control will appear as below;
with an option to Edit
and Delete
.