Data Import
Along with the general field now we can upload a comprehensive database with multiple custom fields through the Data Import feature. This feature enables users to upload their database in their workspaces through .CSV file format. There are quite a few basic checks that we will learn in this article. The Data Import feature is available in Admin Panel under Systems.
1. Database Storage
- We need to determine the relevant Entities based on business needs to which we should add the database to (Contacts, Leads, Prospects, Customers, Companies, and Vendors).
- For database maintenance, it is important to Categorise the existing databases that we are going to import and simultaneously set up the process for new leads in the workspace.
- Also, Custom Fields are to be created for the additional fields that are not available in the workspace as General/System fields.
- For any additional Entity which is not required, Saphyte can hide that entity for a better customer experience.
- The database has to be cleansed for import following the guidelines shared.
2. Data Import Guidelines
In order to import data successfully users have to first clean the data in their excel sheets. Below is the checklist for data clean-up.
- Email id’s for all contacts should be in small letters
- There should not be special characters or extra spaces in the dataset
- Extra space before or after the data values to be removed
- The domain name in the email IDs should be in small letters as well
- Phone numbers to be separated by (12345678910,1234567891)
- Remove any extra column that does not contain data
- Delete any fields with ” – ” or “N/A” or “#NA”
- If there is no data leave that cell blank instead of adding “0” or any other characters like “-“, “NA”, “N/A” etc.
- The Categorisation should be the same with no extra spaces in the workspace or CSV file.
- The values should match in the workspace and CSV file with exact same content.
- If you have Companies to associate with a Lead, Upload the (Company) first and later associate Leads with the Company name.
- The ‘Company id’ in the Data Import sheet refers to the Company Name
3. Steps for Data Import
Once data is cleansed and matched with field values (drop-down values and field behavior (email, numbers etc.), now here the time comes for uploading the sheet to the workspace in the desired Entity.
- Database to be saved in .CSV file before we import it.
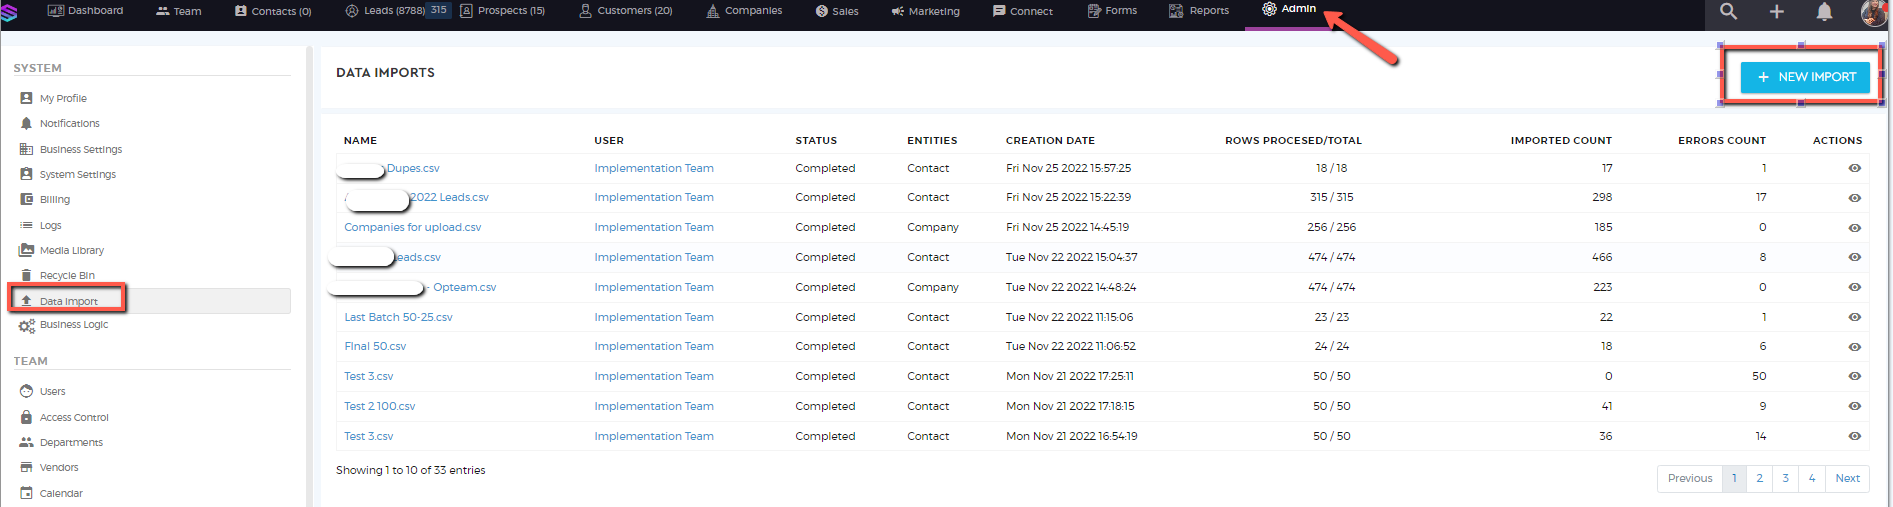
- Click on Admin > System> Data Import > + New Import
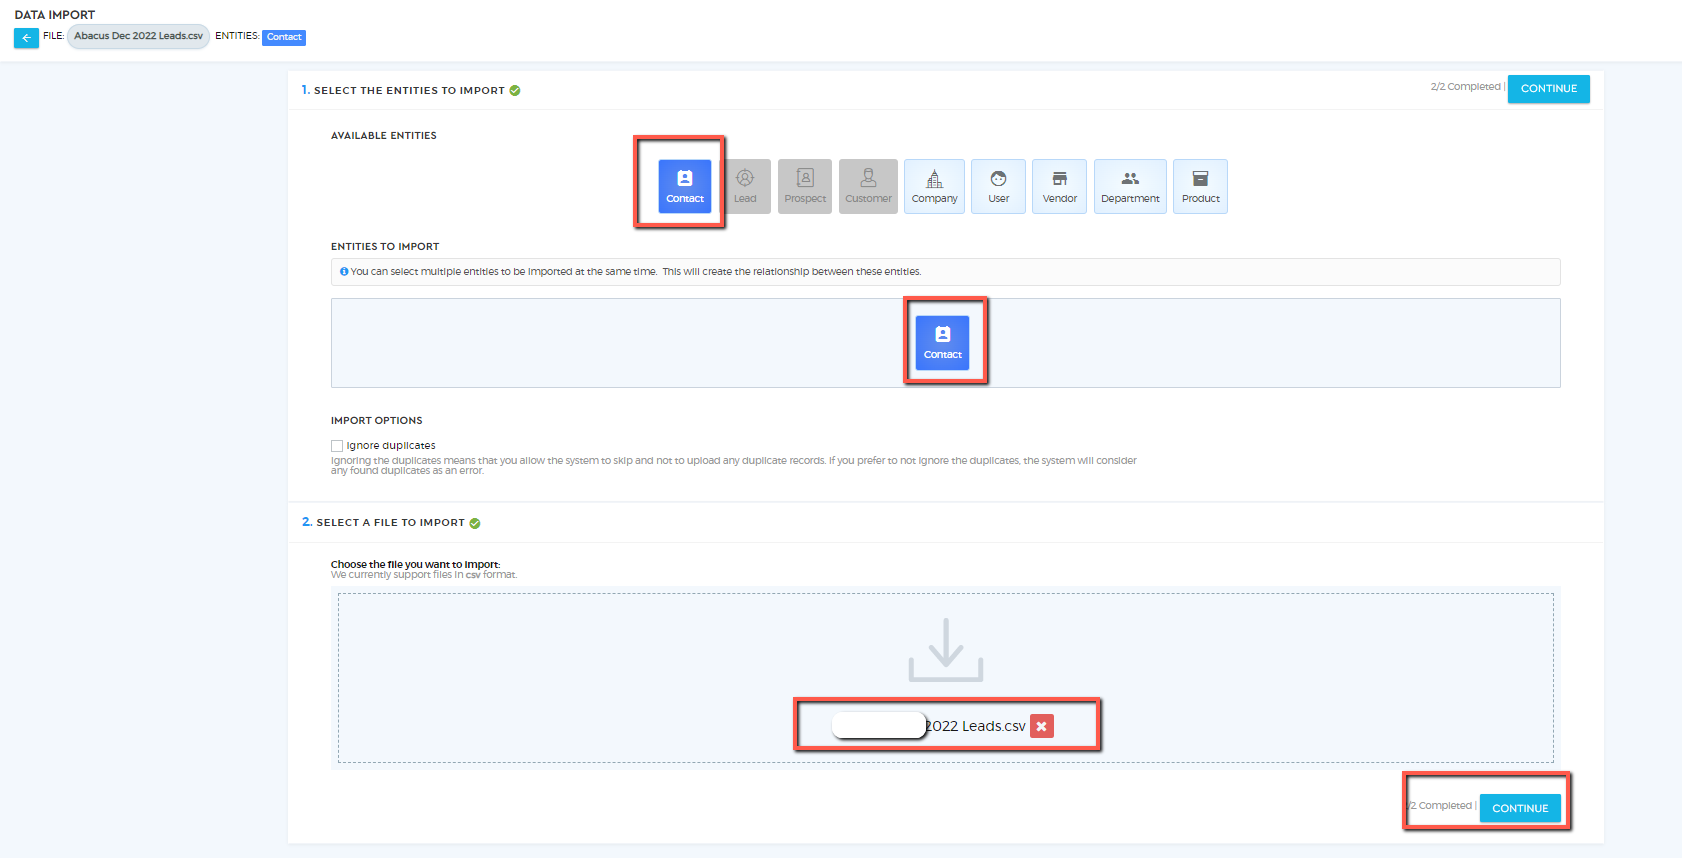
3. Select one Entity that you would like to Import and attach your .CSV database Import File in – ‘Select A File To Import’
section and Click on the ‘Continue’ button.
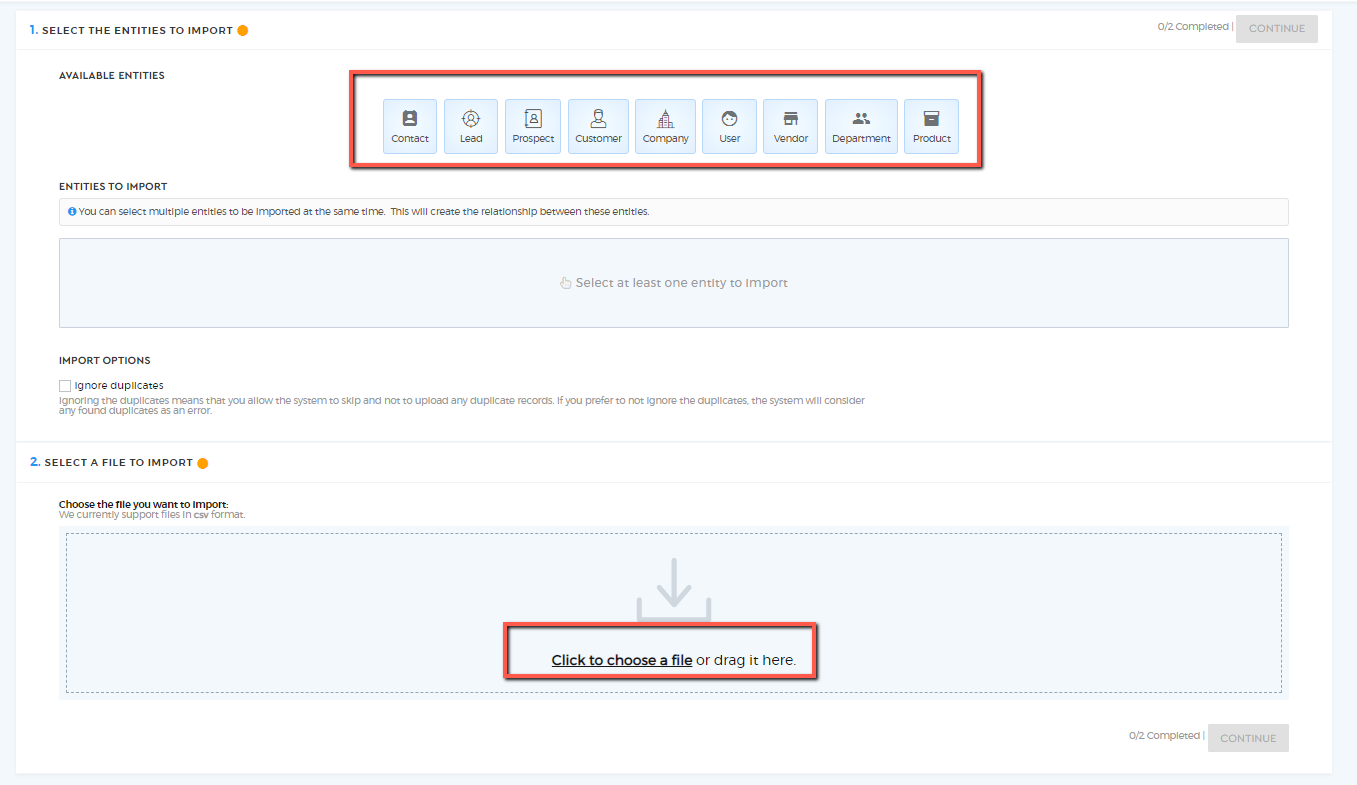
- Data Import – Ignore Duplicates option will enable a user not to upload a duplicate record while doing Data Import.

4. Next page will show up your database from your .CSV file. In this stage, we have to map fields in our Saphyte workspace
and Import sheet.
- You may stretch the bar appearing next to the field name if they are not visible completely.
- Map Custom Fields and General fields from your workspace while selecting the drop-down in row 2.

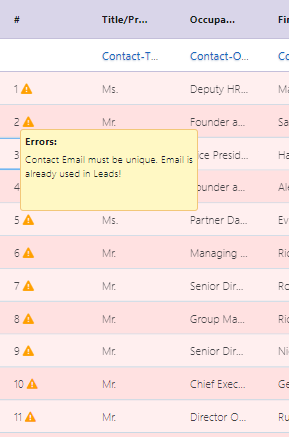
5. When your database values are not matched with your workspace, the cell in the Import Page will highlight it in ‘Pink’
color.
- We may double-click on the highlighted cell and try to amend the values entered to see if it is mapped correctly and if the cell color turns white.
6. Once you see all values are mapped correctly, Click on the ‘Validate‘ button for further validation.
- Links like website URLs and LinkedIn URLs will be always highlighted in pink. However, they are accepted during import.

- It will also show an error message if the email address added to the database sheet already exists in your workspace.
- Click on ‘Continue’ to Import the sheet.
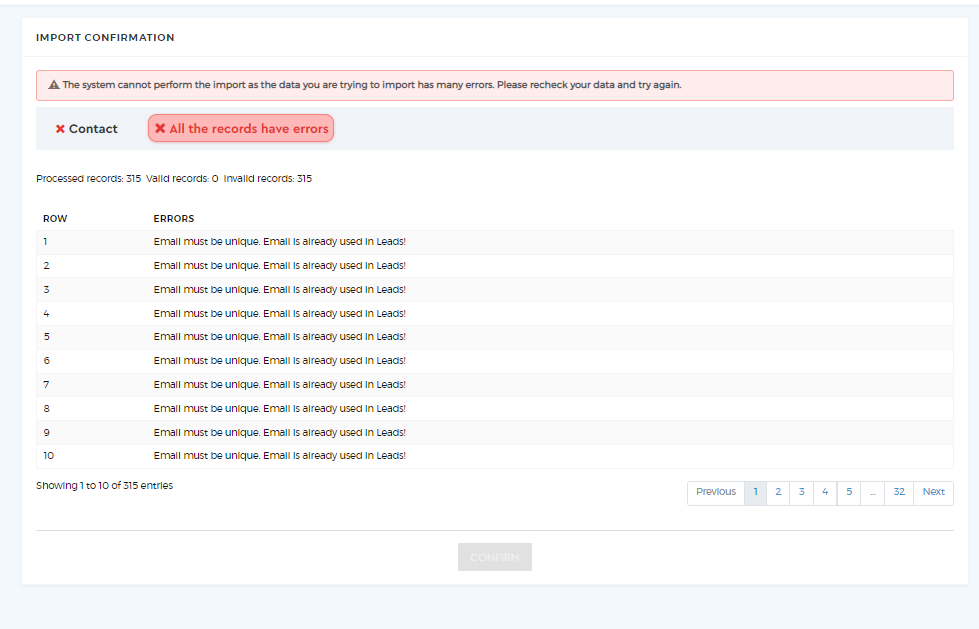
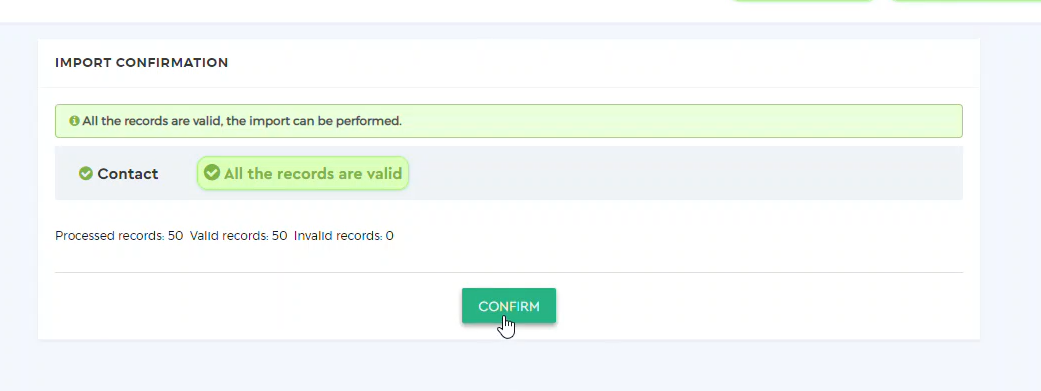
- The system will analyze and show all accurate records and data that will be processed in numbers as well as data with errors that will not be imported.
- After proofreading the Data Import report Click on the ‘Confirm‘ button to import the data.
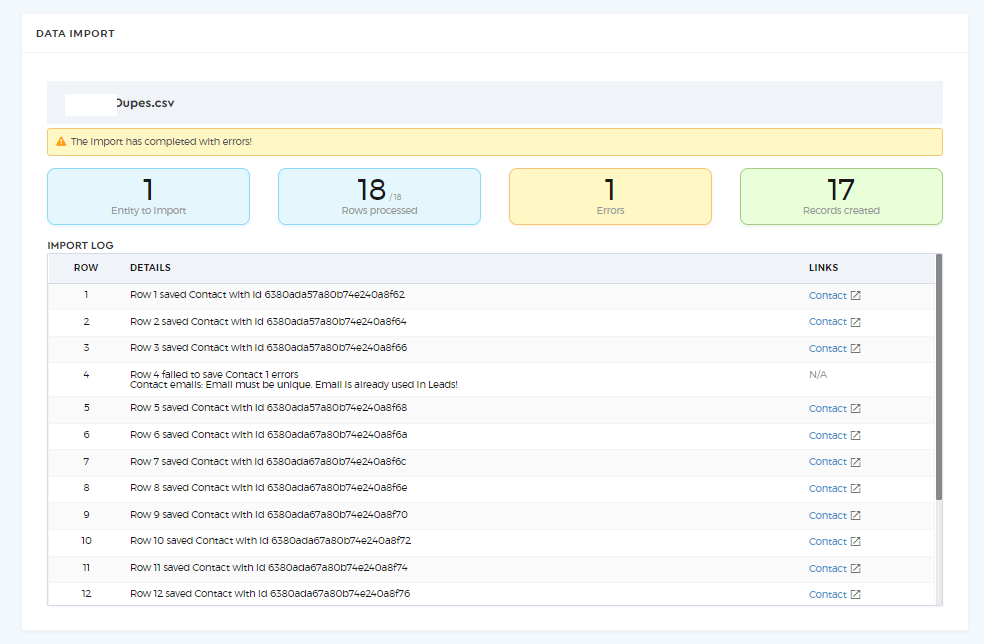
- Do not close the window until you see the results with the data imported successfully (Success Report).
- You may identify entries with row numbers when there is an error and update them manually in the workspace.
- Example: Row number 3 will be row number 4 in your .CSV file.

- If all records already exist it will not allow you to Import the database.