Calendars & Event Types
What are Calendars & Event Types Features?
Now we have a feature available in Saphyte CRM to schedule ‘Event Types’ based on our availability being configured in the ‘Calendars’ option. You can create your own Calendar, indicate your working hours and create one or multiple schedules to apply to your events. There is also an advance setting to restrict the event schedule to a specific date/dates with multiple time slots being applied/configured to schedule the availability/unavailability of the user.
Note: This feature will help the business entities having their appointments and events booked through their websites. We can map an online form for the appointments or events on their website with the Saphyte CRM workspace under Calendars and Event Types feature, schedule the availability/unavailability of the users and manage the appointments or events in an efficient manner.
Please find below the Steps to Create a Calendar.
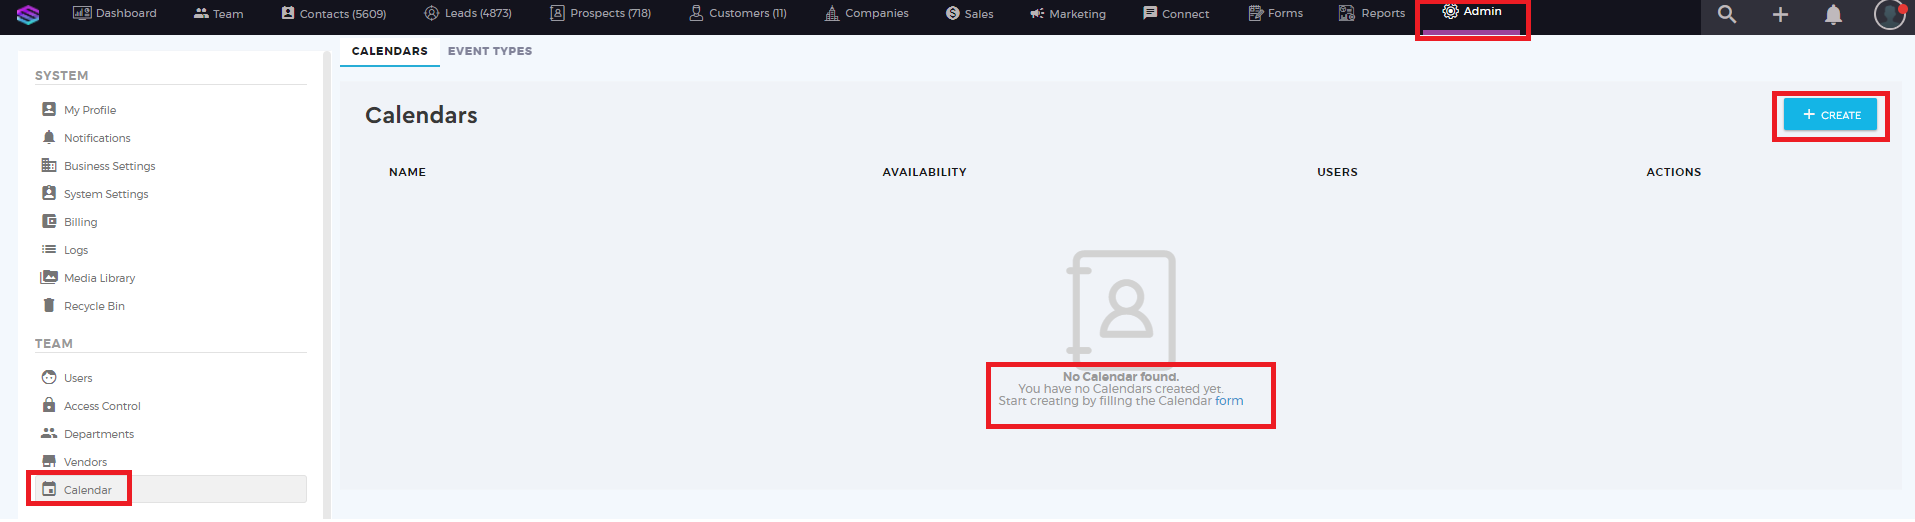
1. Click on the ‘Admin’ Panel, Select ‘Calendar‘, and click on the
button. You may also start creating a Calendar availability via filling up the Calendar form URL on the Calendars page below the icon –

2. Add ‘Calendar Name’, ‘Timezone’, select Weekdays and Working Hours. We may add two different time slots skipping lunch break on each day. Deselected weekday, represent’s user Unavailable on that day. Select Team Members Entity (User) from the dropdown. You may also select Attribute and Operator to define and Match any desired condition to set up your Calendar. Save the desired configuration through ‘SAVE‘ button.
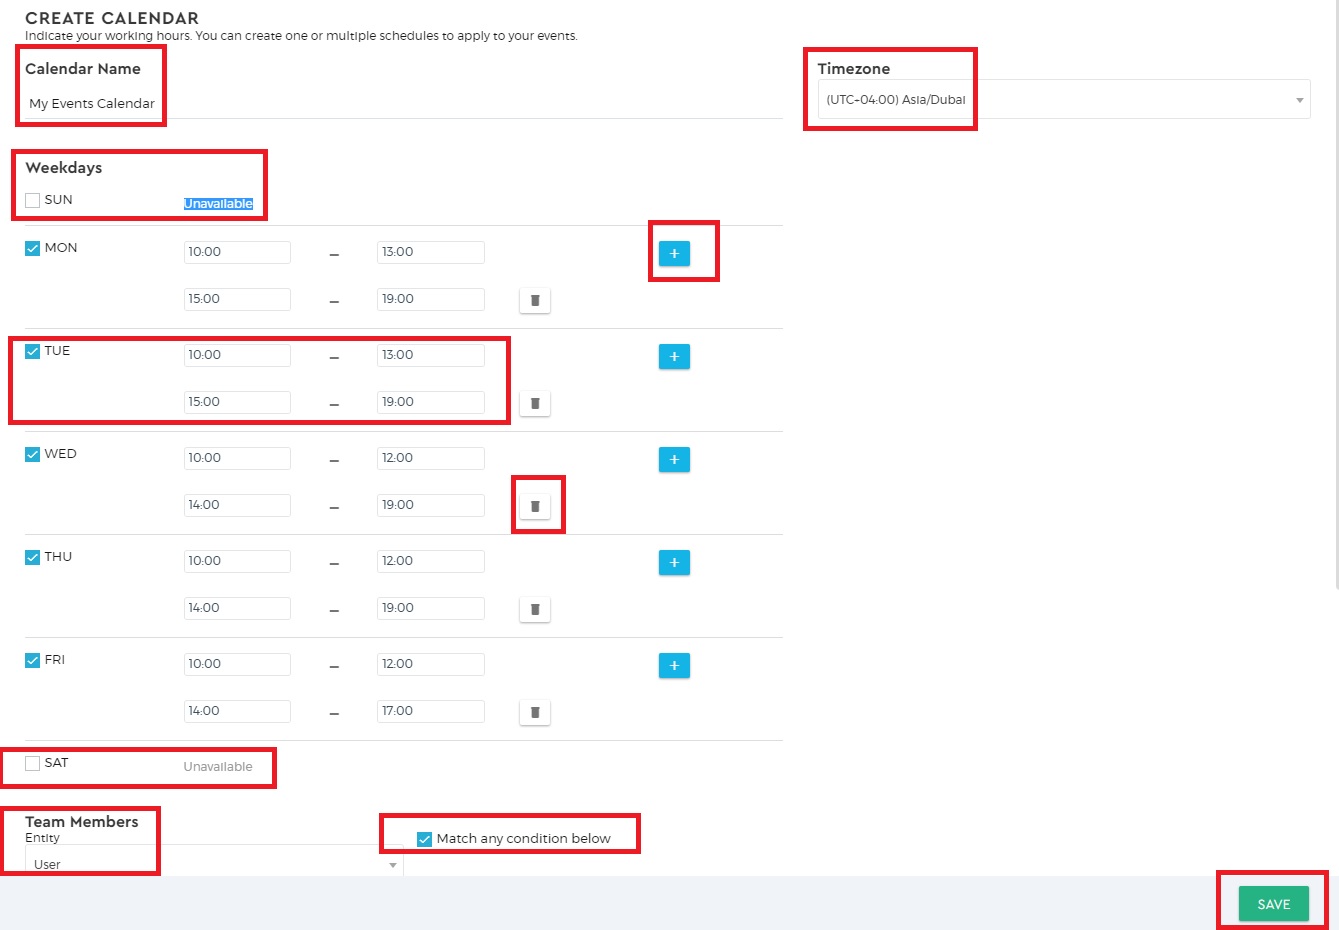
3. Please refer to the below snapshots for more details on Attribute Selection and to Match Conditions.

Advanced Calendar Creation
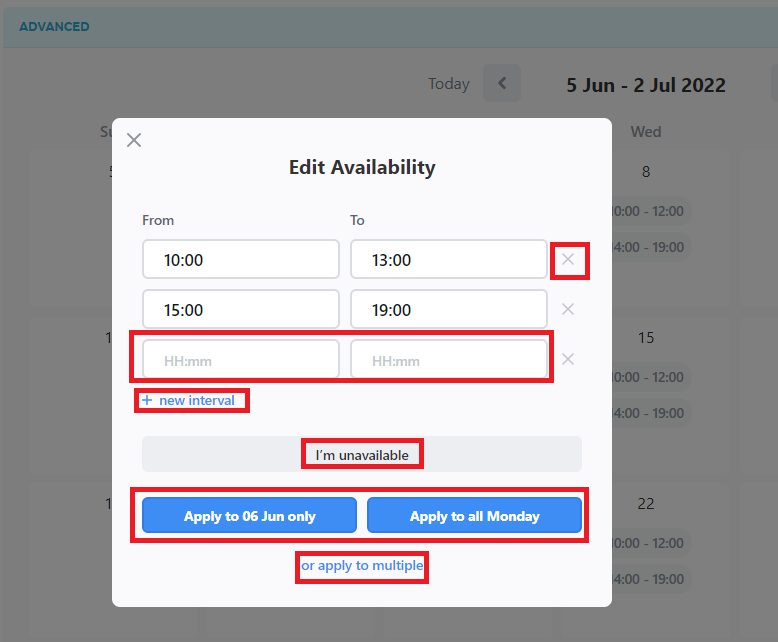
1. Click on ‘ADVANCED’ Menu and expand the view. Select date or weekday where you would like to customised the schedule as desired.
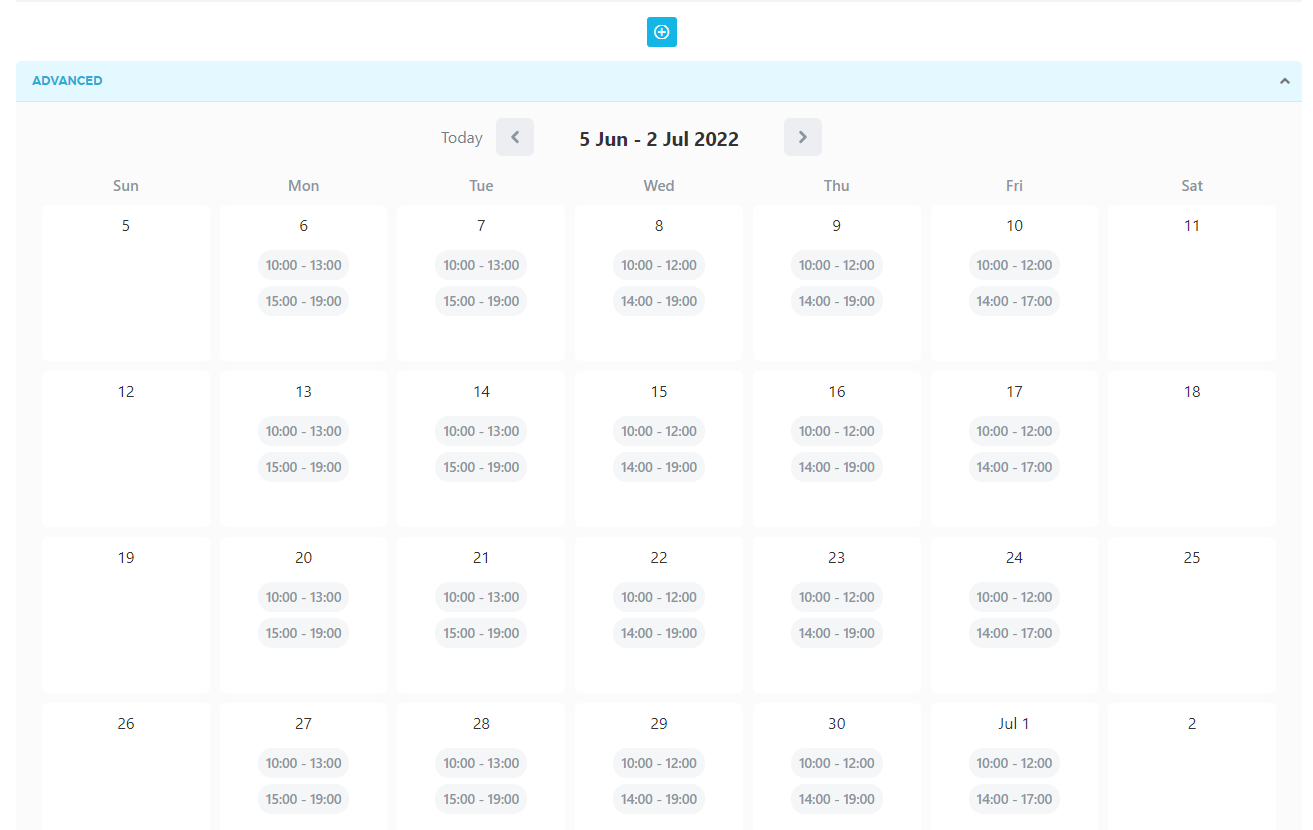
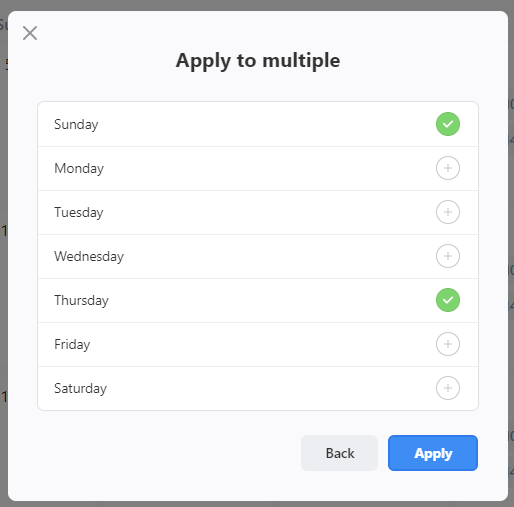
2. We can edit Availabity/Unavailability, Delete the existing schedule, set New Interval, Apply updates to only one date or overall Calendar for a particular day or multiple weekdays
3. This is how your Calendar will display after you apply, Edit Availability feature.

Create Event Types
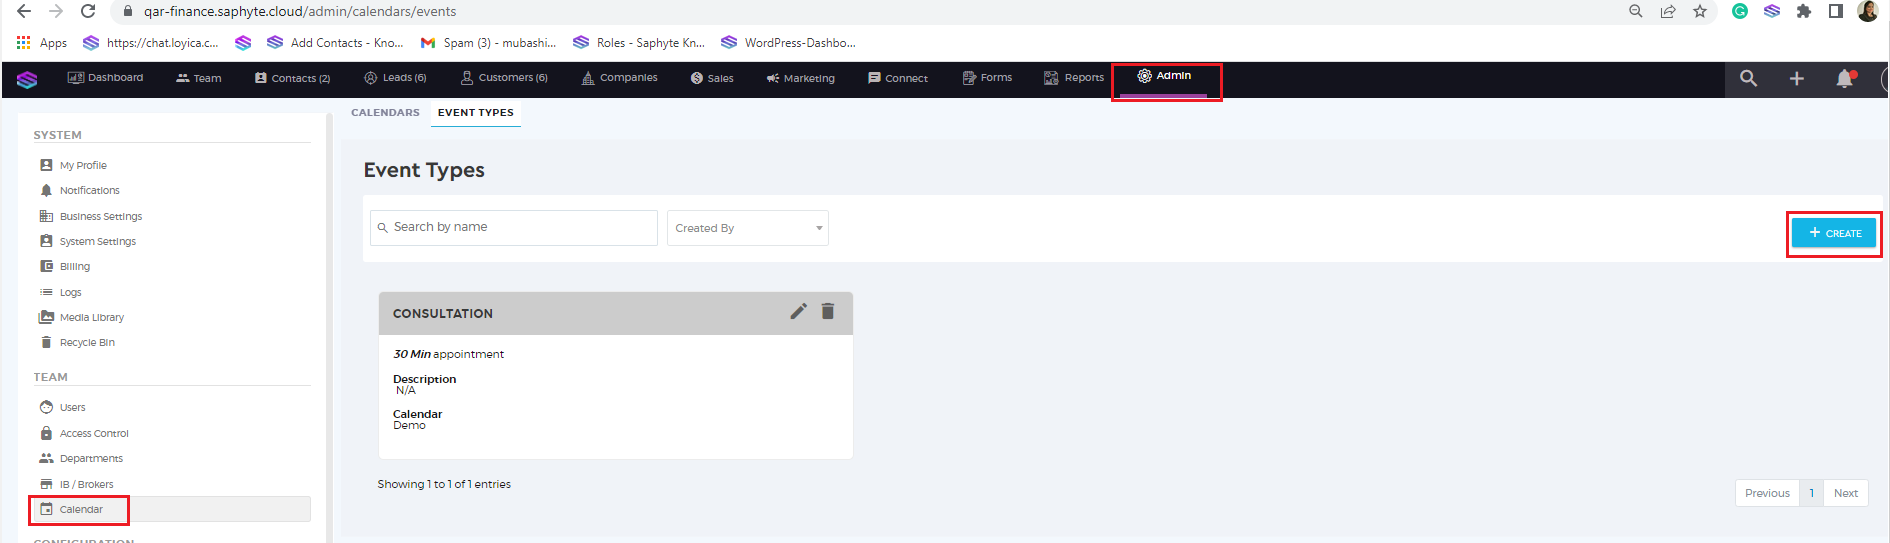
1. Event type is created in order to sync Events with the user Calendar availability. Click on the ‘Admin’ Panel, Select ‘Calendar‘ under TEAM menu. Click on the Event Types and
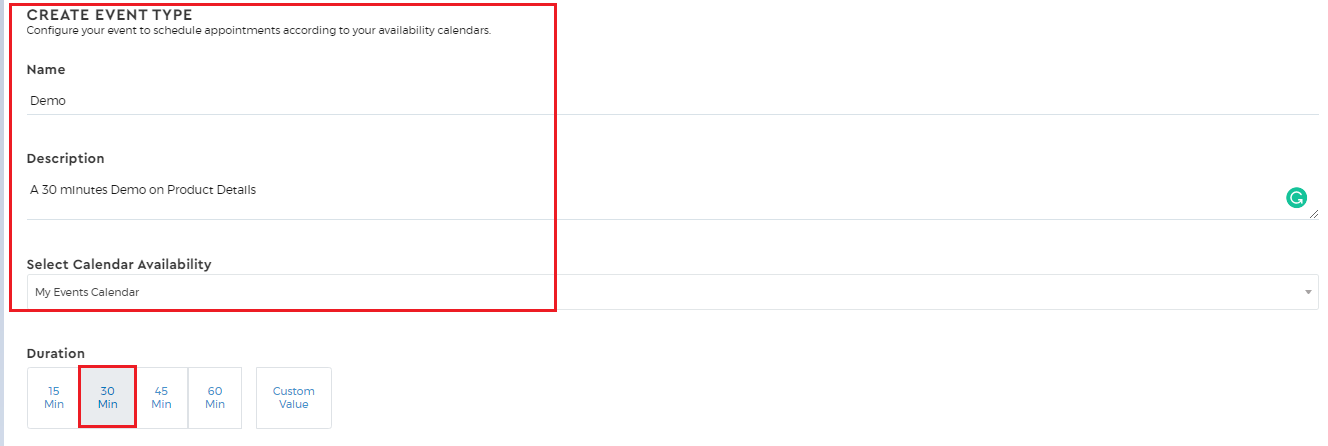
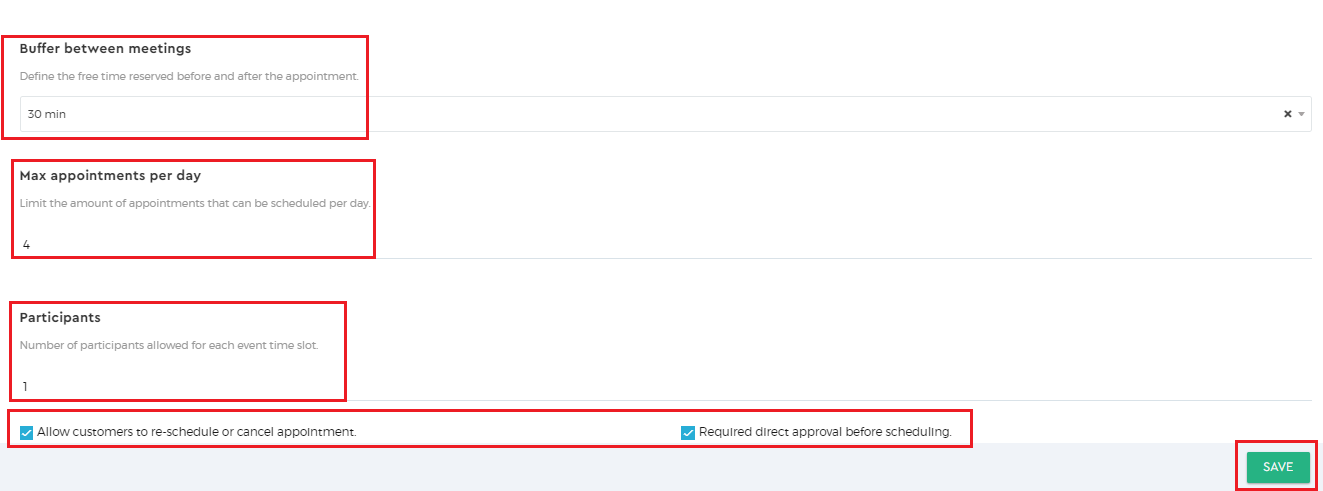
2. Add Name, Description, Select the Calendar Name from dropdown that we have created above in this tutorial in ‘Select Calendar Availability’, select event duration, update buffer between two events in minutes from the dropdown values, update maximum appointments to be scheduled per day and number of participants.
What is direct approval before scheduling?
1. There are two checkboxes designed to add more flexibility for Customers to Reschedule or Cancel the appointment and for the users to Approve the Event Before Scheduling.
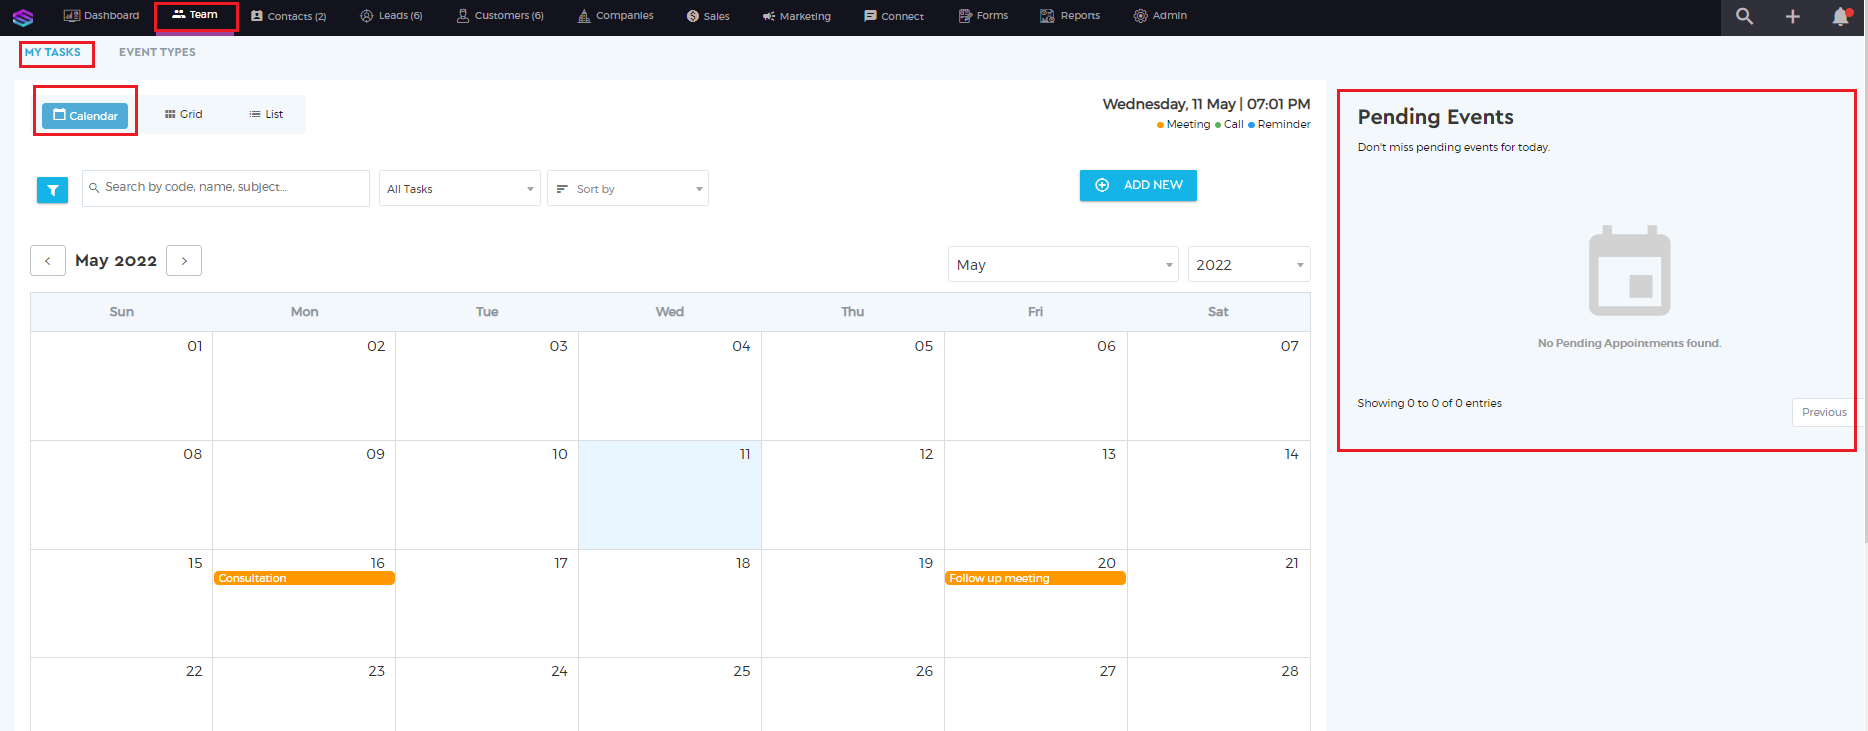
2. Once appointment is booked, user can reveiw and approve these appointments from Team Panel in the Header, under MY TASKS > Calendar > Pending Events section.