SendGrid Email Service
At Saphyte, now users can have their own SendGrid accounts integration with their workspace through SendGrid API Key. Users may configure their own SendGrid account to send all emails from their Saphyte workspace, this will allow users to have more customization such as removing the default unsubscribe option added on the footer in email campaigns.
SendGrid Email Service allows users to send all their emails without having to maintain email servers through their own SendGrid account. It also helps users to send bulk emails with extremely high email deliverability rates. SendGrid manages all of the technical details, from scaling the infrastructure to ISP (Internet Service Provider) outreach and reputation monitoring to whitelist services and real-time analytics.
Mandatory requirements to integrate a SendGrid Account with Saphyte workspace for uninterrupted services.
- An active and verified SendGrid account with a paid subscription to send more than 100 emails per day.
- API key retrieved through user SendGrid Account to be shared with Saphyte team.
- User creation, verification of user, and domain authentication in their SendGrid Account.
- Set up the time zone in the Account Details section of SendGrid Account as per the country or region of the user.
- Add payment method/card details in the Billing section of the SendGrid Account.
- Select SendGrid subscription based on user requirements from the Products section.
1. How to set up your SendGrid Account in Saphyte?
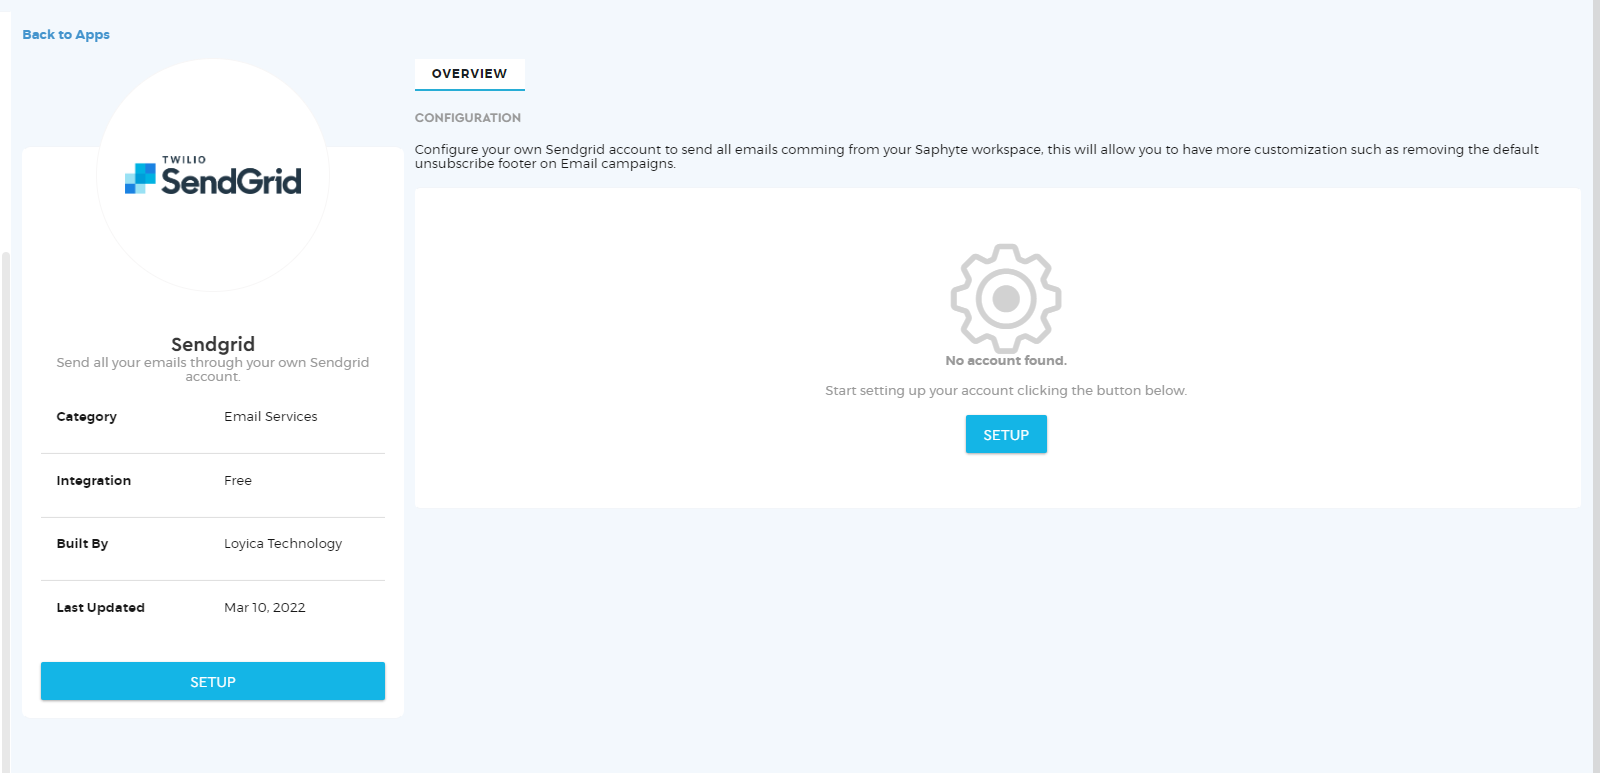
- Click on Admin > Select App Marketplace from Integration Menu > Click on the ‘SETUP‘ button of SendGrid App under Email Services Apps.

- Click on the SETUP button again and one new browser will open.
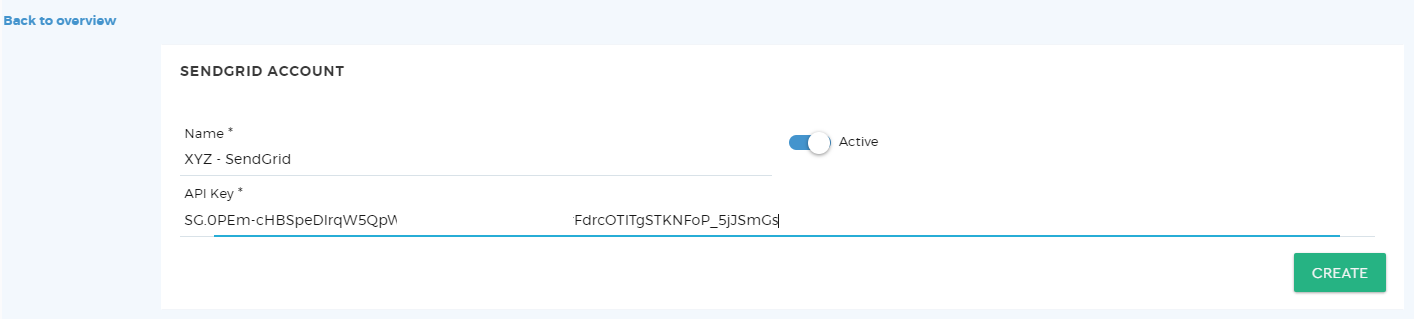
- Add Name* > Click on Active to activate API Key in the Saphyte workspace.
- Add API Key* created in your SendGrid account and click on the ‘Create’ button.
- We will receive the below error if the user’s Domain is not Authenticated in the SendGrid account.
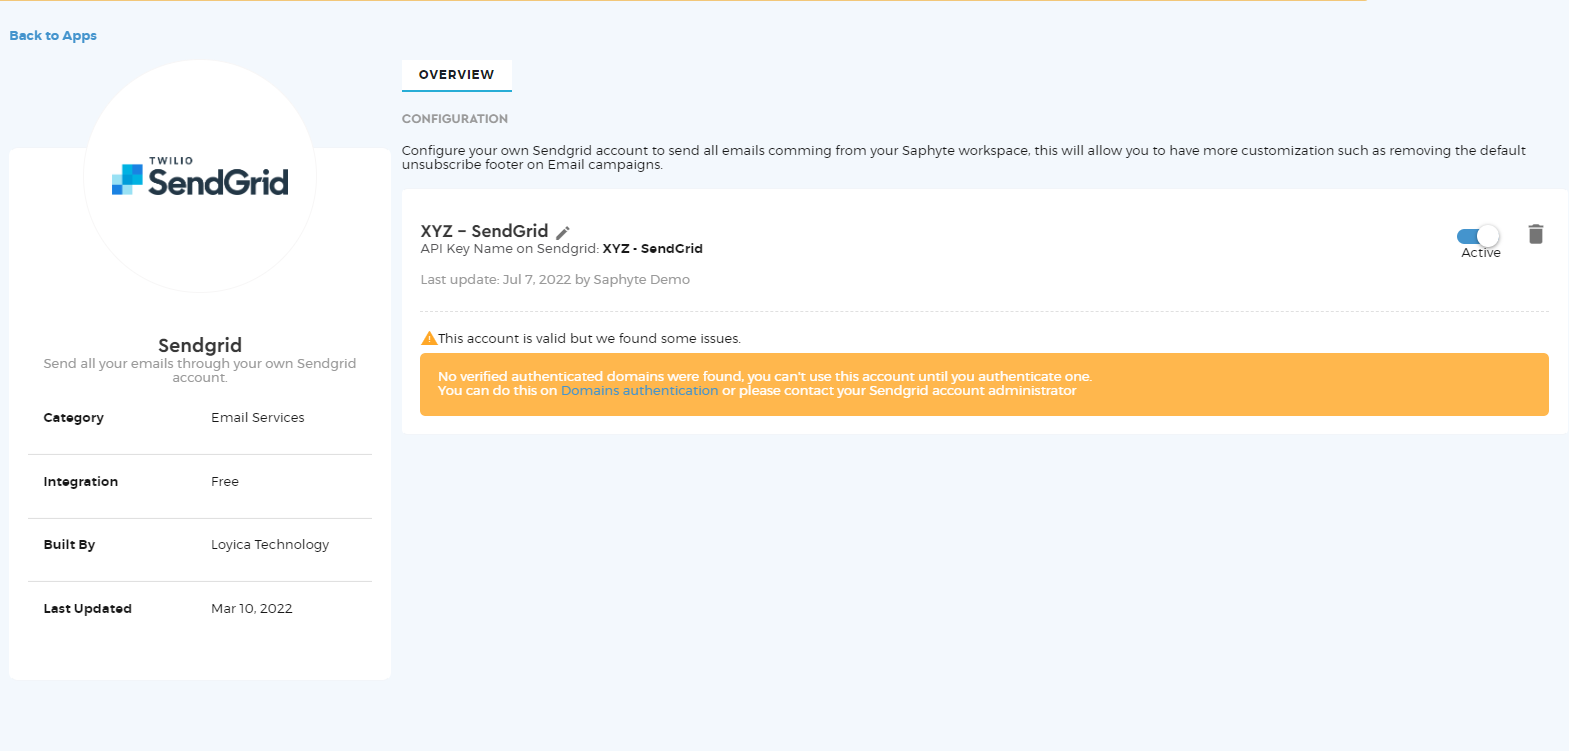
- A successful domain authenticated SendGrid account, will display as ‘This account is Valid‘.
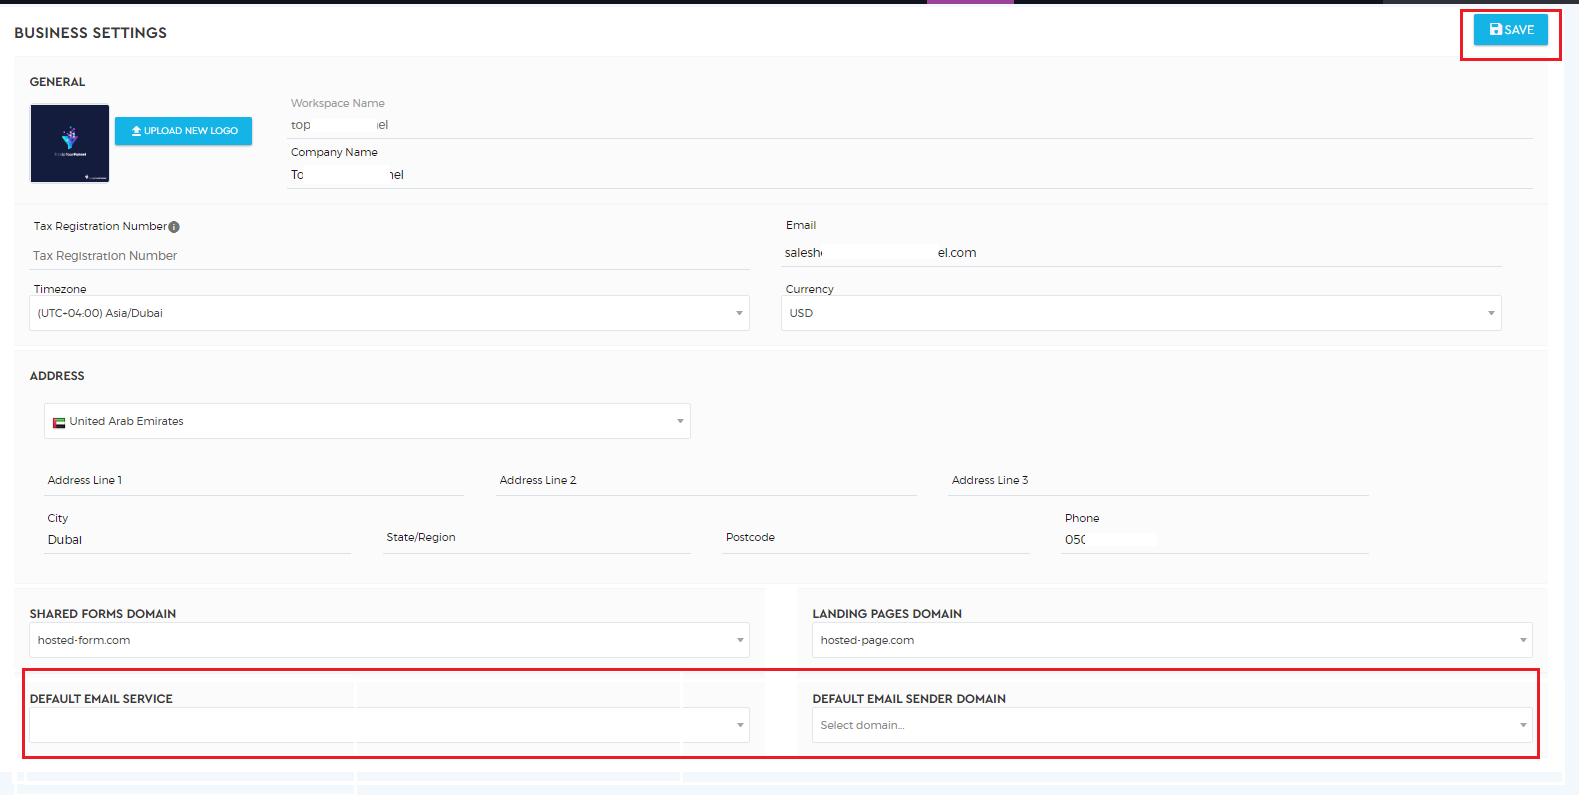
- Go to Business settings and select default email service – it will be the name that we have added while updating the API key for SendGrid Account access in Saphyte.
- Select the default email sender domain – your domain URL and click on ‘SAVE’ to complete the configuration.

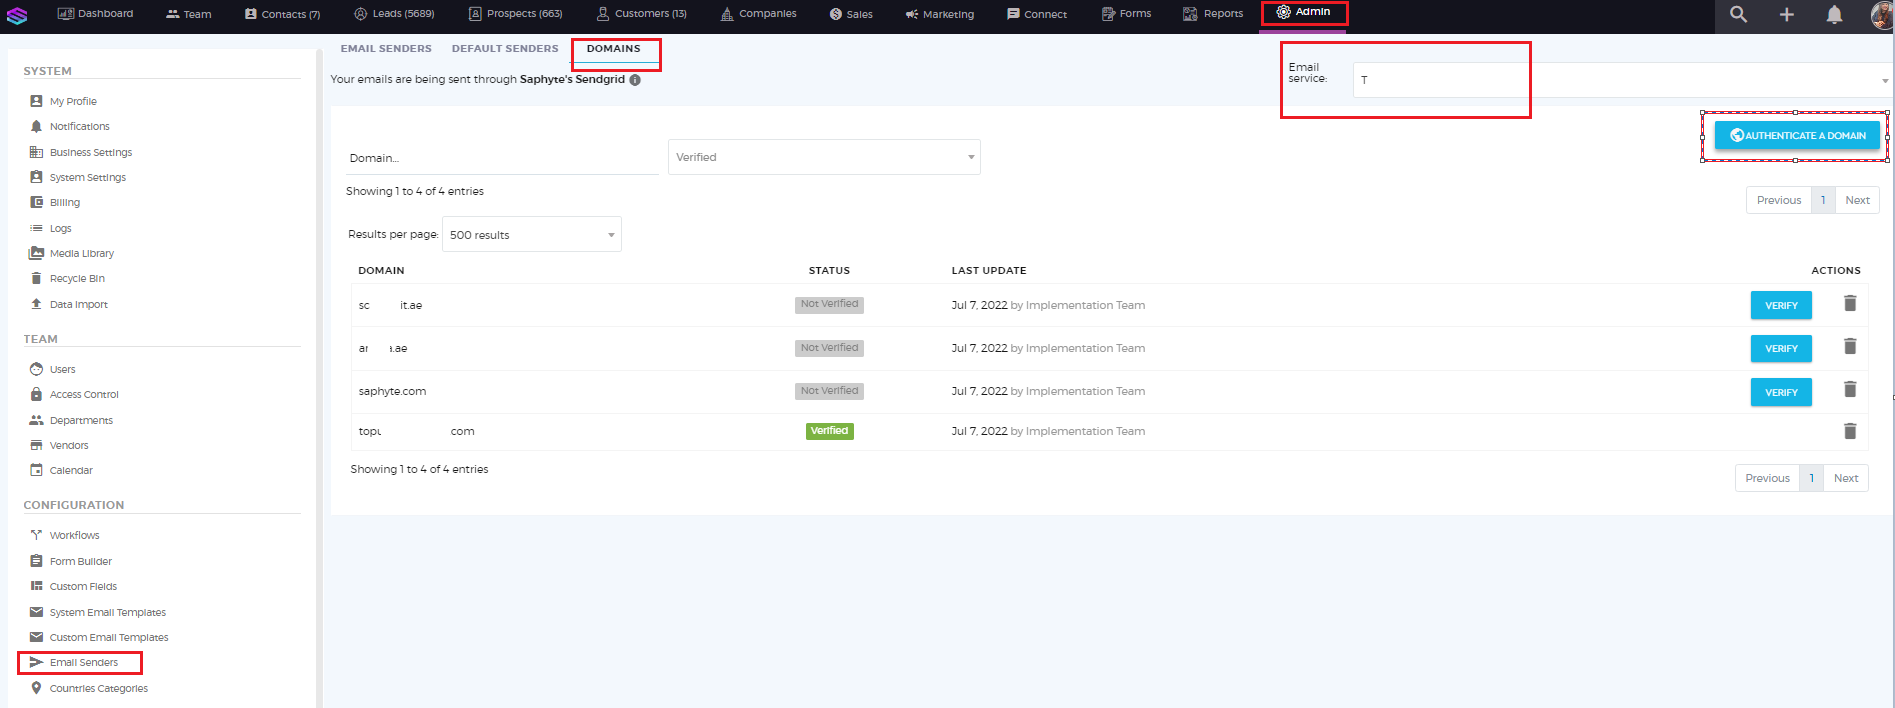
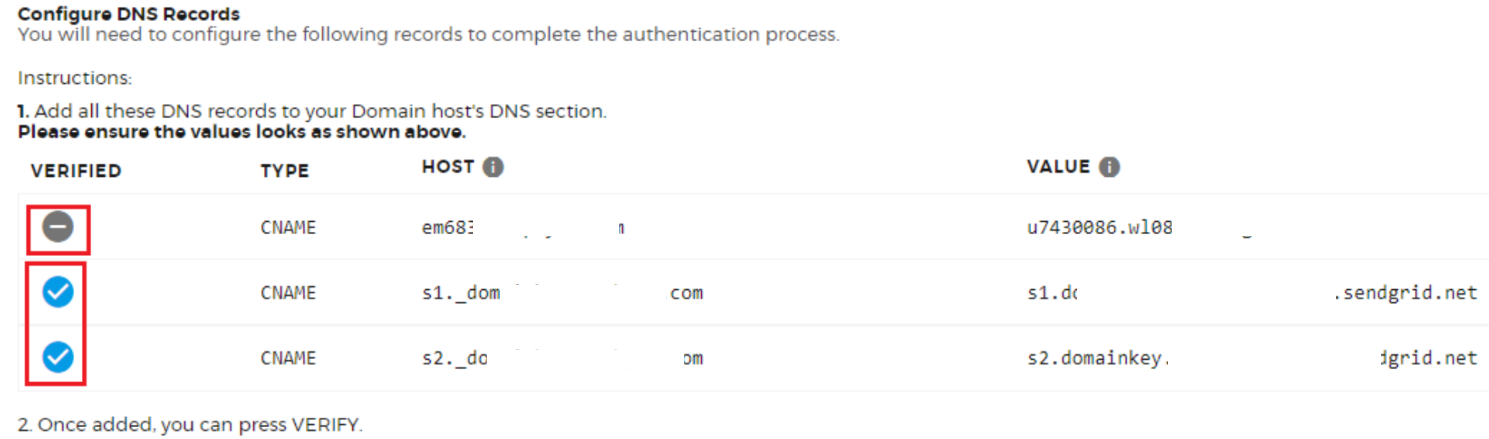
- Once DNS records from the SendGrid account have been updated in the DNS server and the domain authentication process is done, users can configure their domain on the Saphyte workspace.
- From Header Menu Bar > Admin > Email Senders from Configuration Menu > Domains > Select Email Service from Dropdown > Authenticate Domain button.
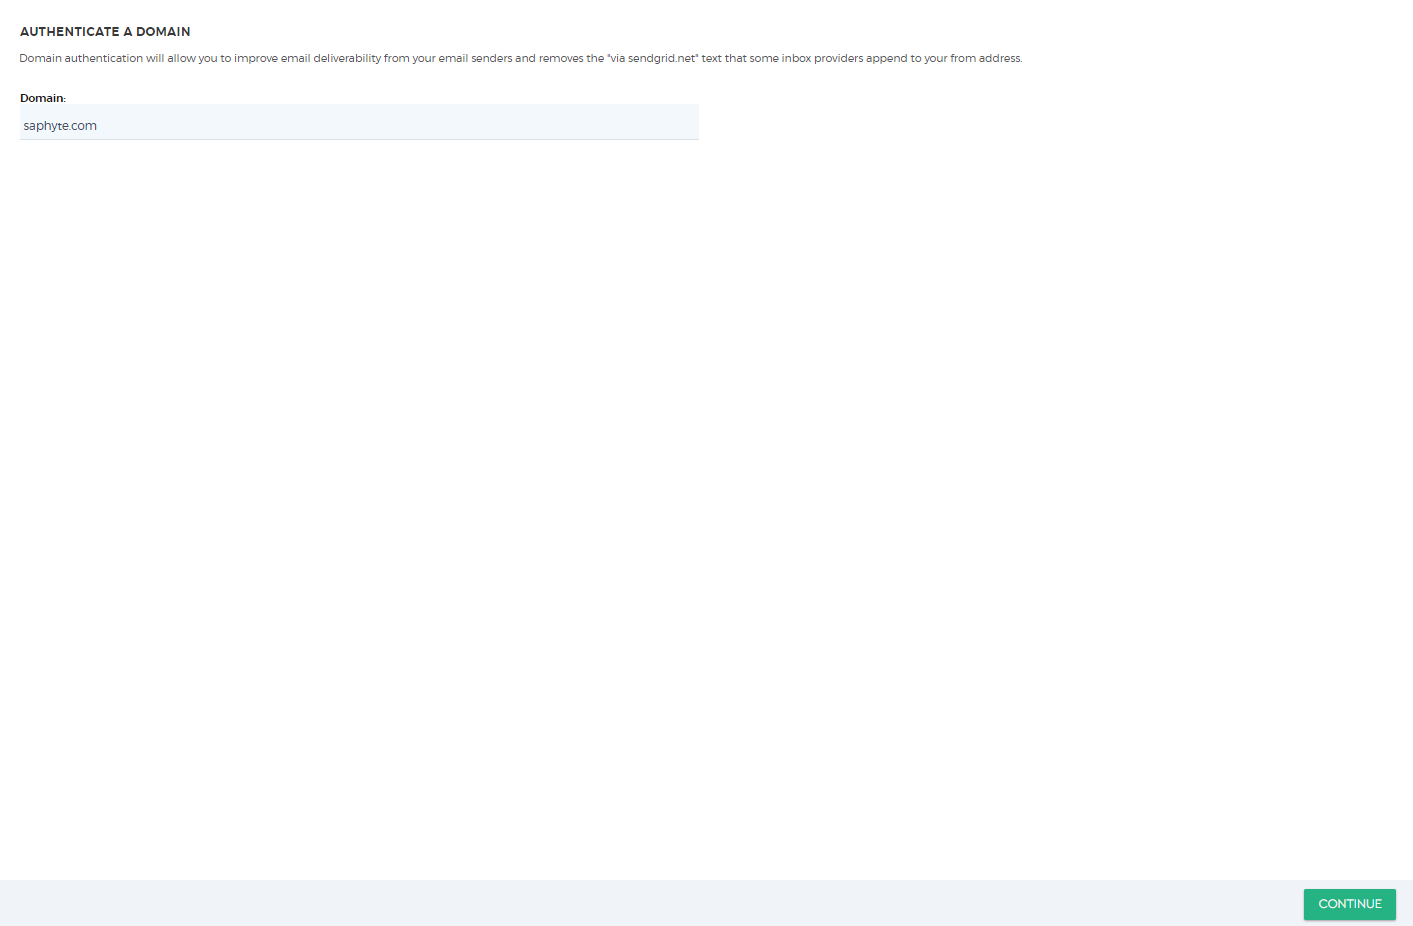
- Insert domain name in the browser appearing after clicking on Authenticate Domain and click on the Continue button.
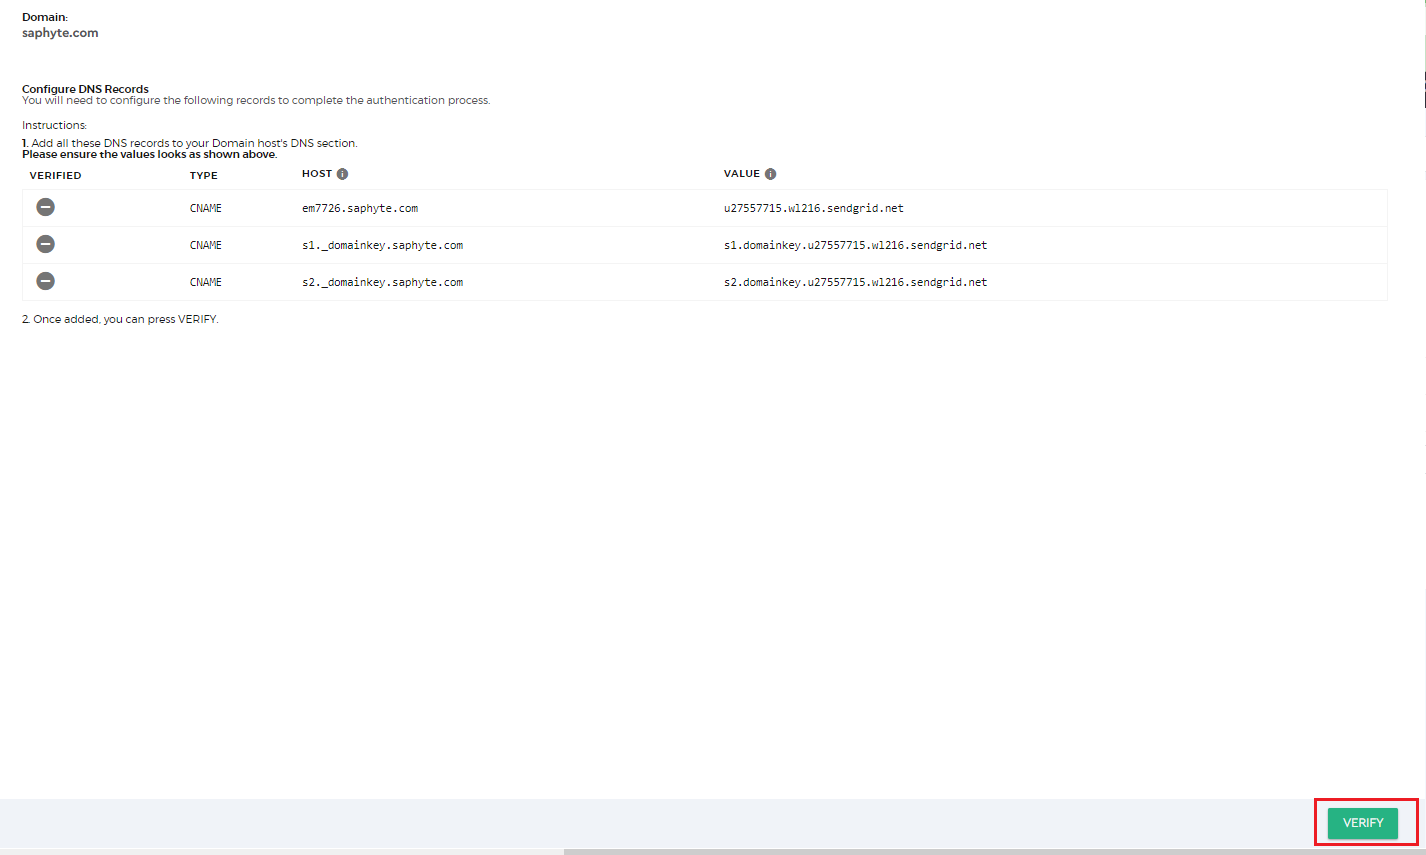
- If DNS records are already updated in the domain host server the icon beside the DNS records will turn into blue color.
- Click on Verify button, if DNS records appear with the blue icon.
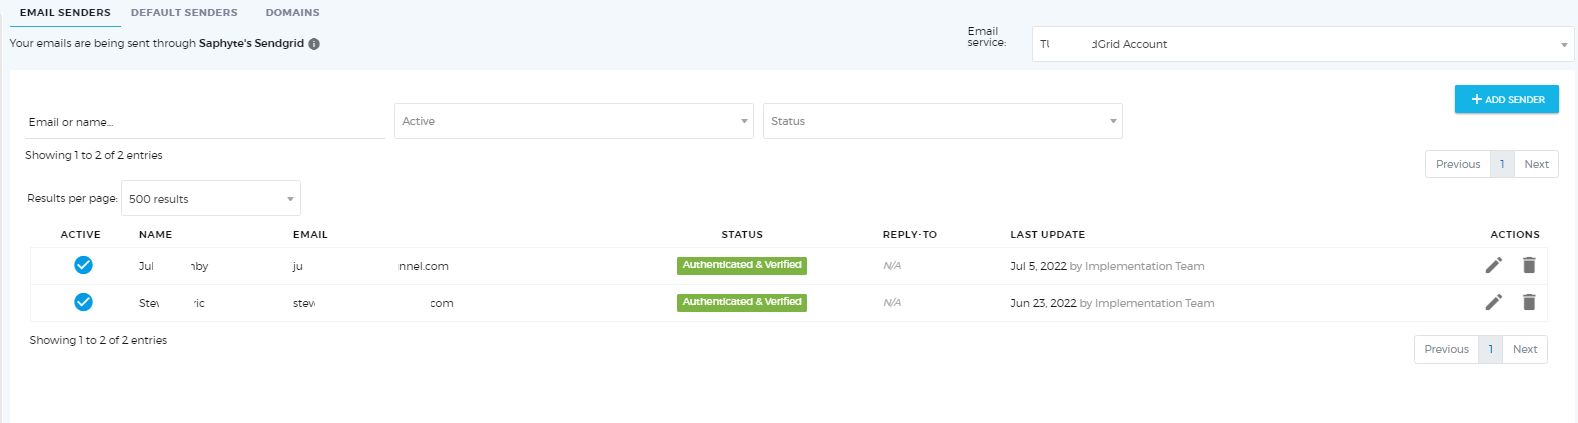
- Once the domain is authenticated, all email id’s added as email senders from the domain will be authenticated and verified automatically.
- If verified icons show up in Grey color, it means DNS records are still not updated.
- Sometimes Host info URLs can also be identified as value info URLs for a few servers. Tweaking and updating these values can be considered if DNS records are not updated over 48-hour or more.
- Users may add email senders while clicking on the
 button.
2. How to create a SendGrid email service account?
- Create your SendGrid account on www.sendgrid.com
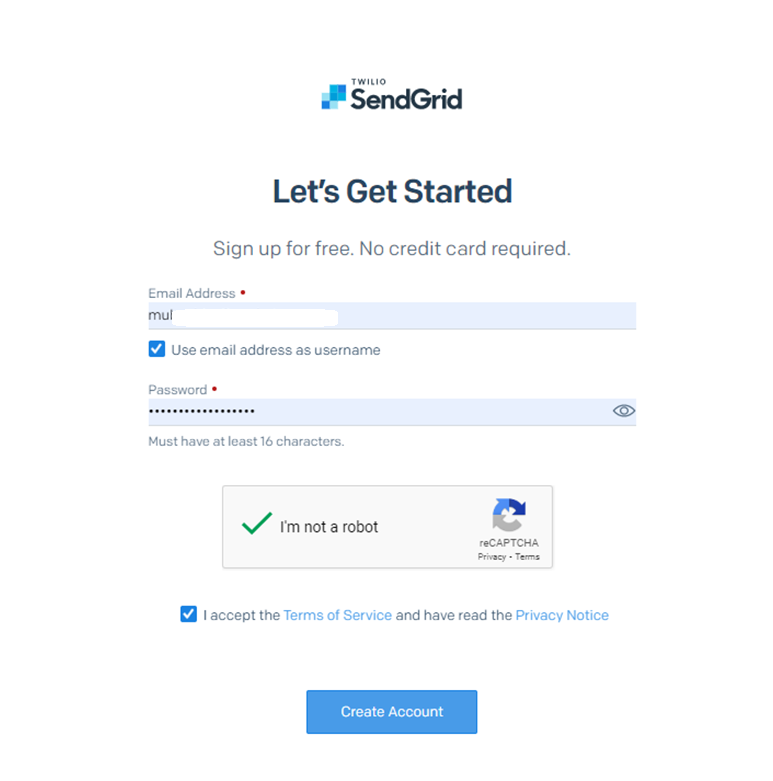
- Add all relevant information related to your account and click on the ‘Get Started’ button

3. How to Verify your SendGrid Account and add Security Setting?
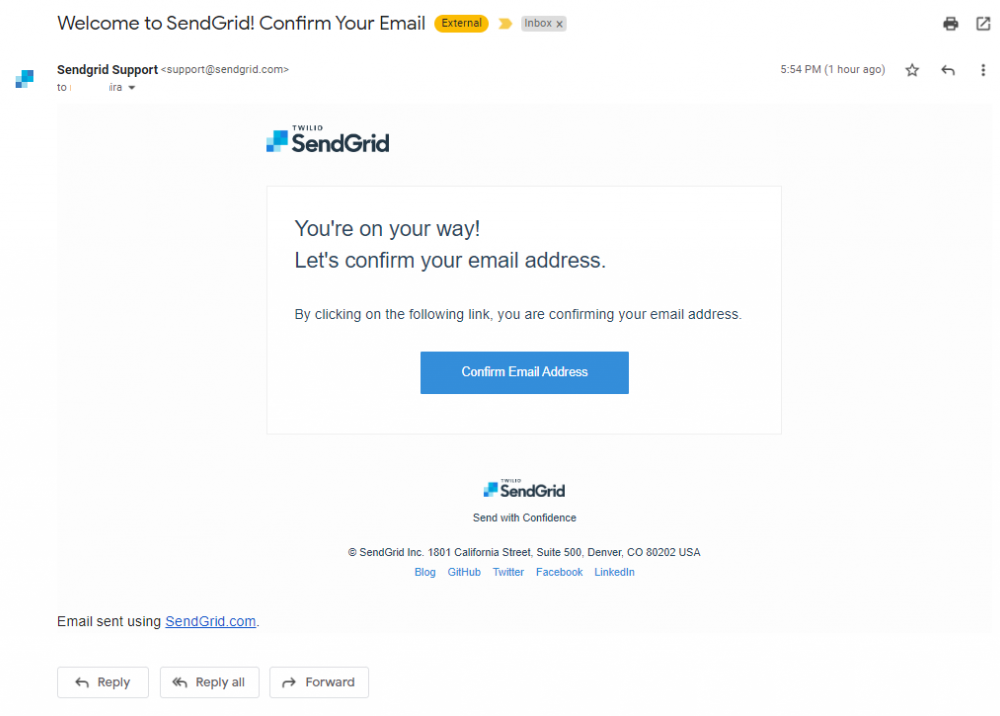
- Once you click on the ‘Get Started!‘ button, there will be a notification email sent out to your email id for confirming your email address.
- Click on the ‘Confirm Email Address‘ button to verify your email address registered with your SendGrid account.
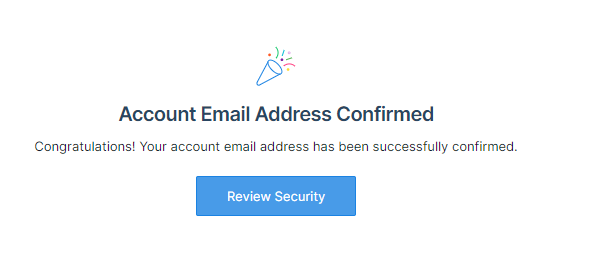
- Click on the ‘Review Security‘ button to make sure the Security Checkup step is complete for your SendGrid account.
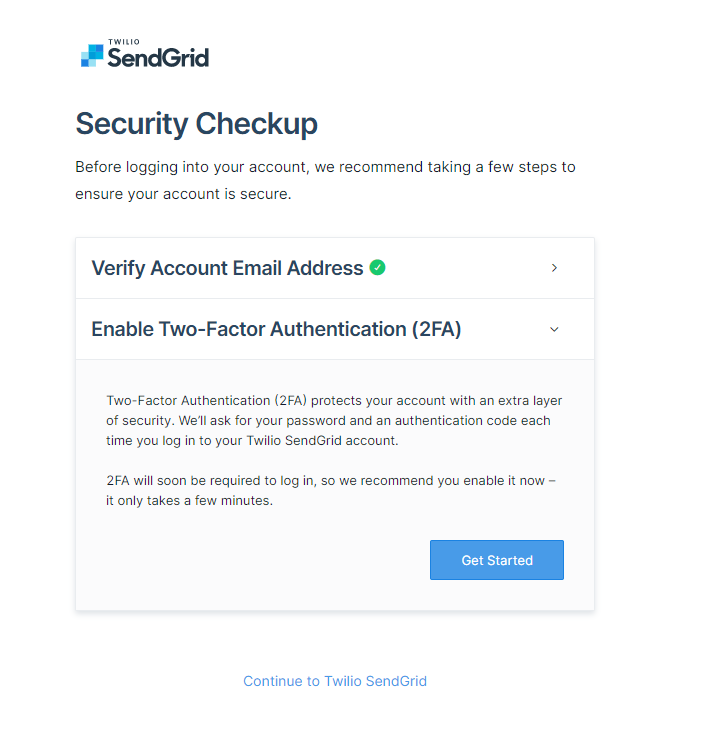
- Click on ‘Done‘ if your email id is already verified and expand the next security method.
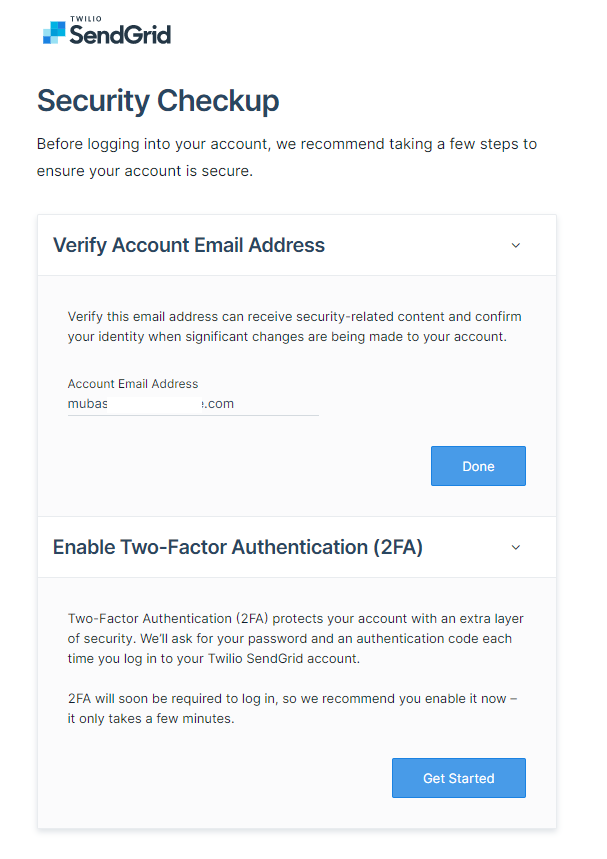
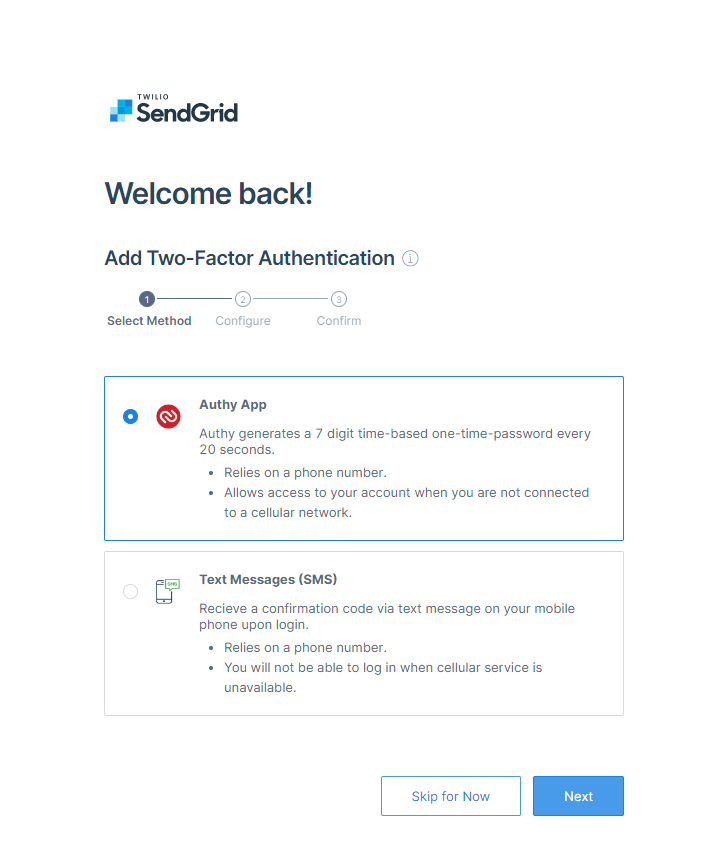
- Enable Two-Factor Authentication (2FA) to add two layers of security to your account.
- Click on the ‘Get Started‘ button to start Enabling Two-Factor Authentication (2FA).
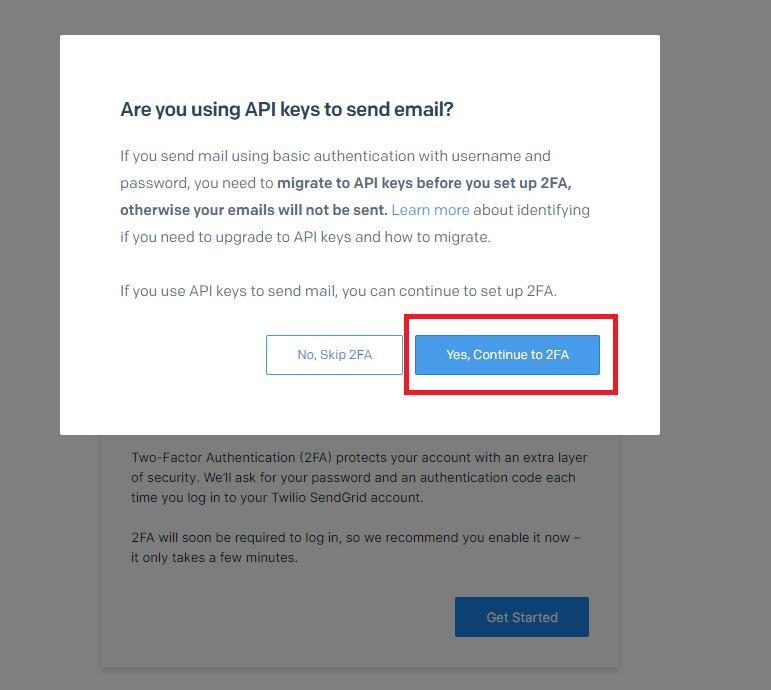
- Select, the ‘Yes, Continue to 2FA’ button as we will be initiating the integration process of the SendGrid service with your Saphyte workspace through API keys.
- Select one of the security options either through ‘Authy App’ or ‘Text Messages’.
- Click on ‘Next’ once you have selected the radio button with the required mode of communication for SendGrid security.
- Select your country code and add a mobile number for receiving SMS with a security code.
- Once you click on the ‘Next’ button, a security code will be sent to your mobile number.
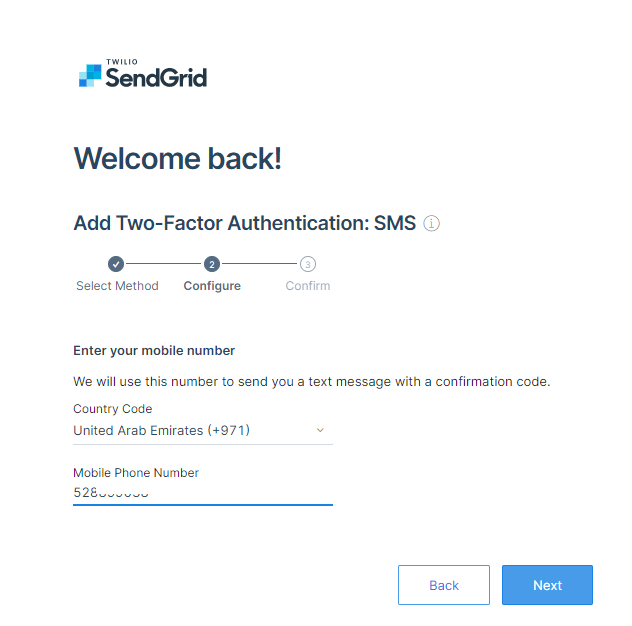
- The security code sent to your mobile number is to be added to the ‘Authentication Code’ section.
- Click on the ‘Save’ button to Save the updates.

- When you complete the Email Confirmation and Two-Factor Verification Process, the home/profile page will display the steps completed so far.
- The next step would be ‘Authenticating Domain’ and ‘Adding Payment Method’.

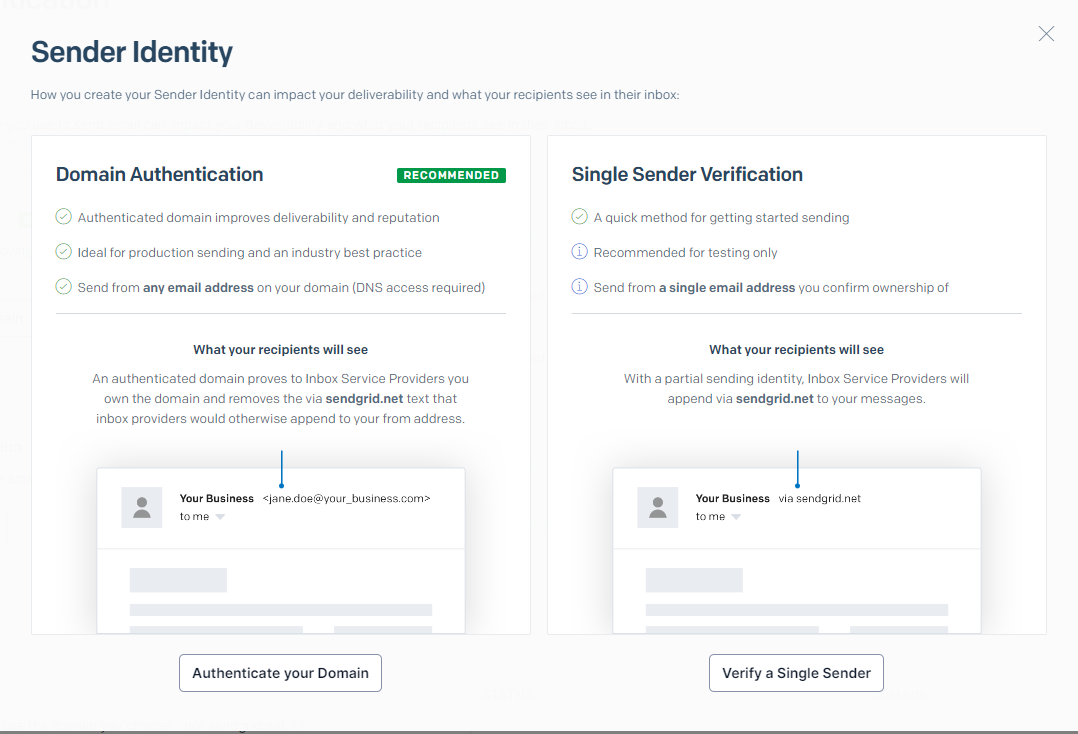
4. Single Sender Verification and Domain Authentication
- Before sending the first email, users need to create a sender identity, make sender verification and authenticate the sender domain.
- Domain authentication is to be done from the Sender Authentication section in the Settings Menu of the user’s SendGrid account.
- DNS records retrieved from your SendGrid account need to be updated on the DNS host server for the domain to be used for sending emails.
- There are two steps associated with the successful authentication process.
1. Creating a Single Sender and verifying the sender – it will show – via SendGrid.net as ownership of the email sender.
2. Authenticate a domain – Click here to know more
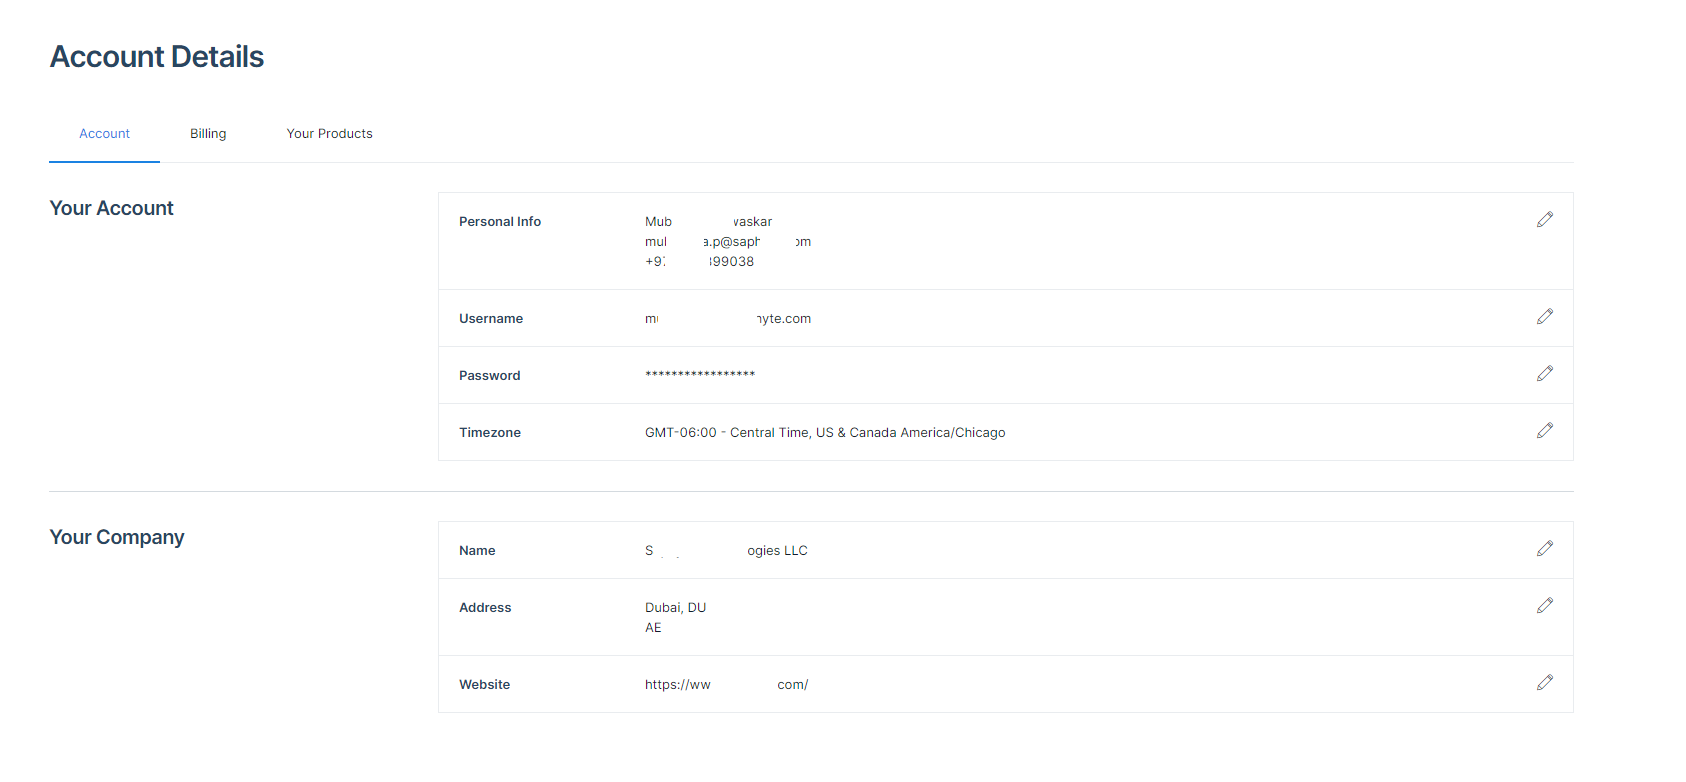
- Update your time zone, and payment method and select desired subscription as per your business need from the Account Details section of your SendGrid account.
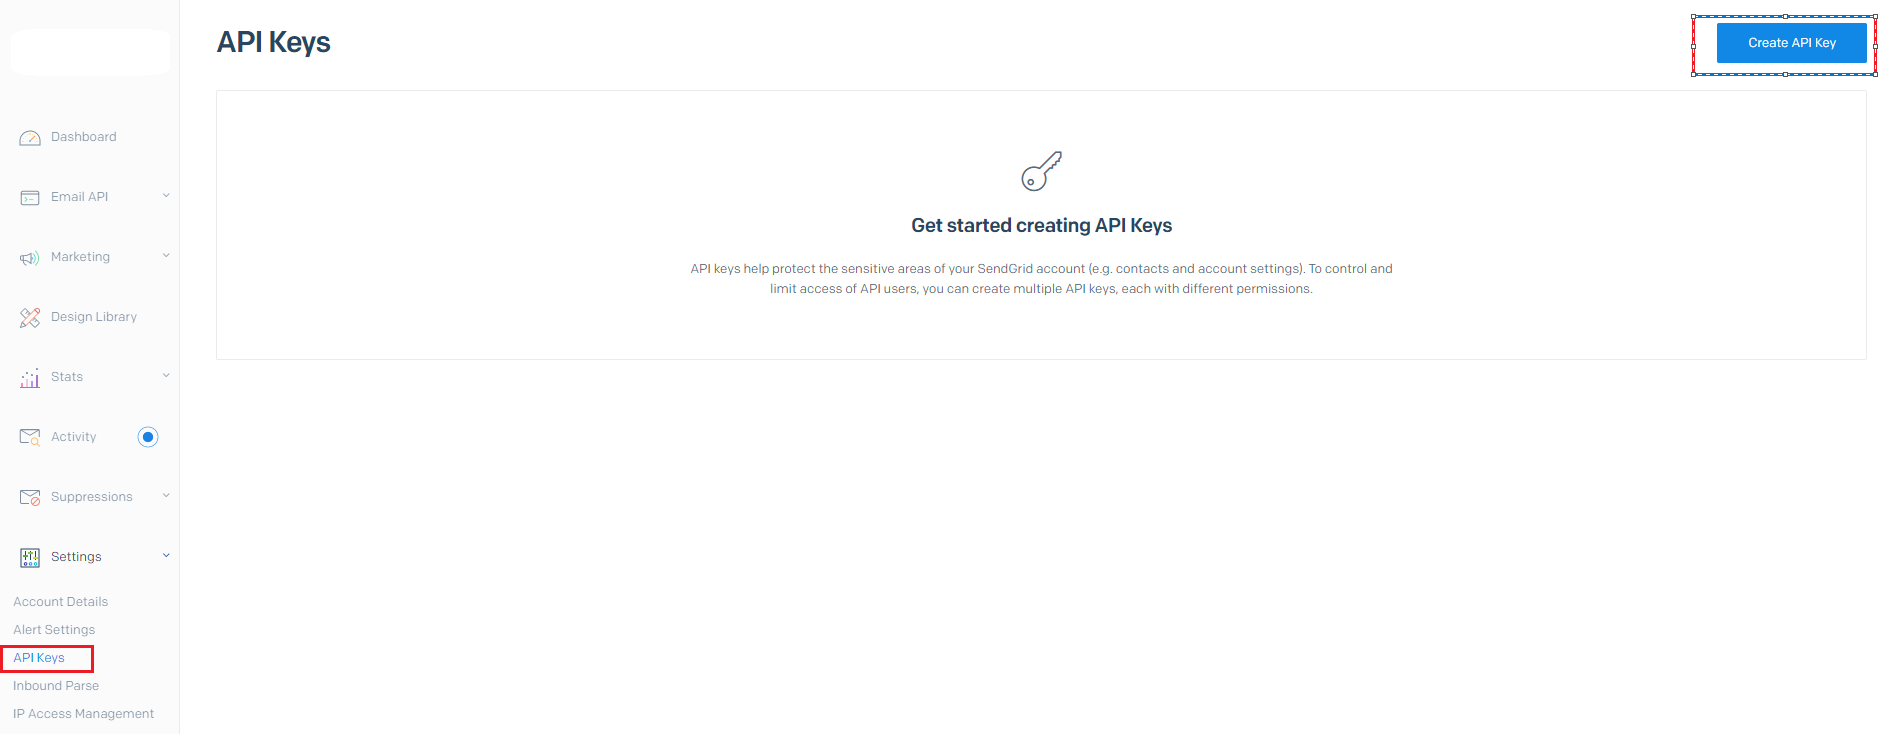
5. How to create API Key from the SendGrid account?
- In the Settings Menu of your SendGrid account, Select API Keys > Click the ‘Create API Key’ button.
- Add ‘API Key Name‘ > assign ‘API Key Permissions‘ > click on ‘Create & View‘ button.
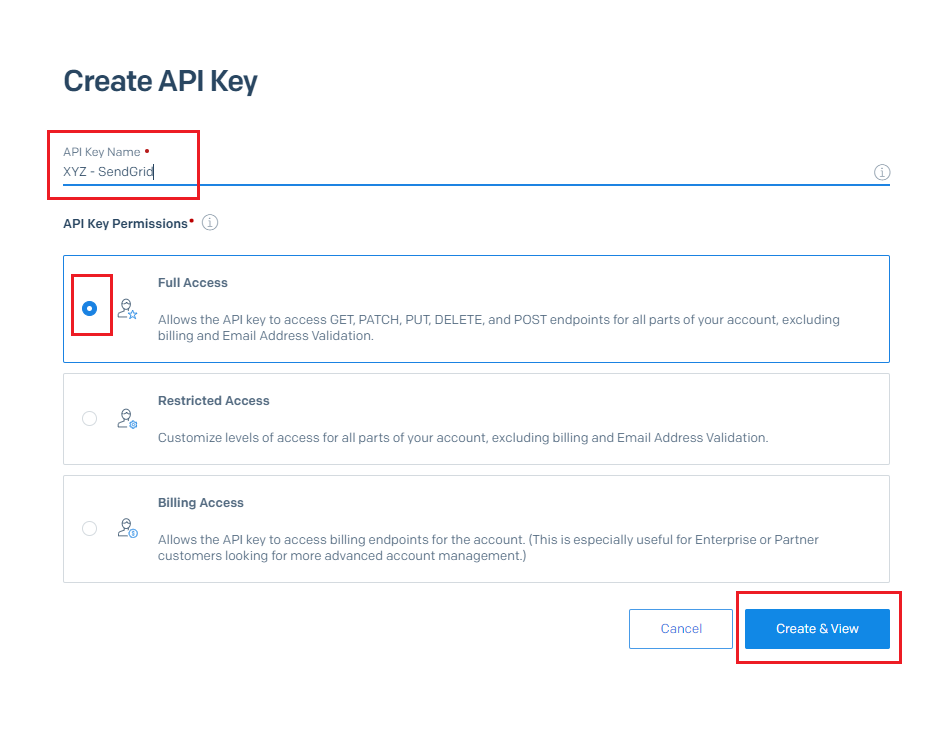
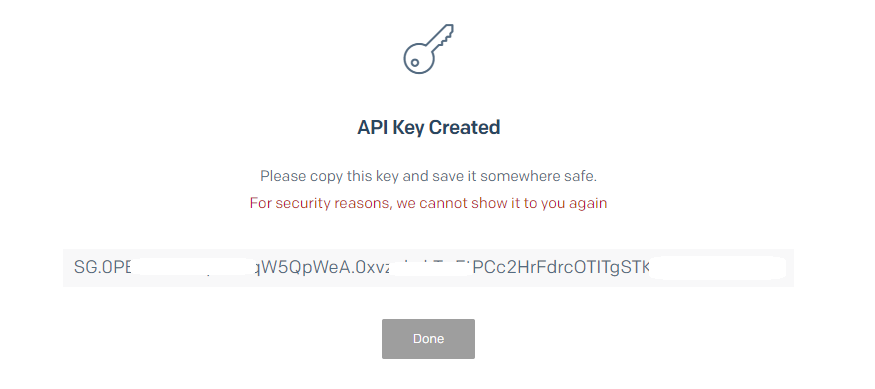
- Click on the API Key Created as below to copy the API Key.