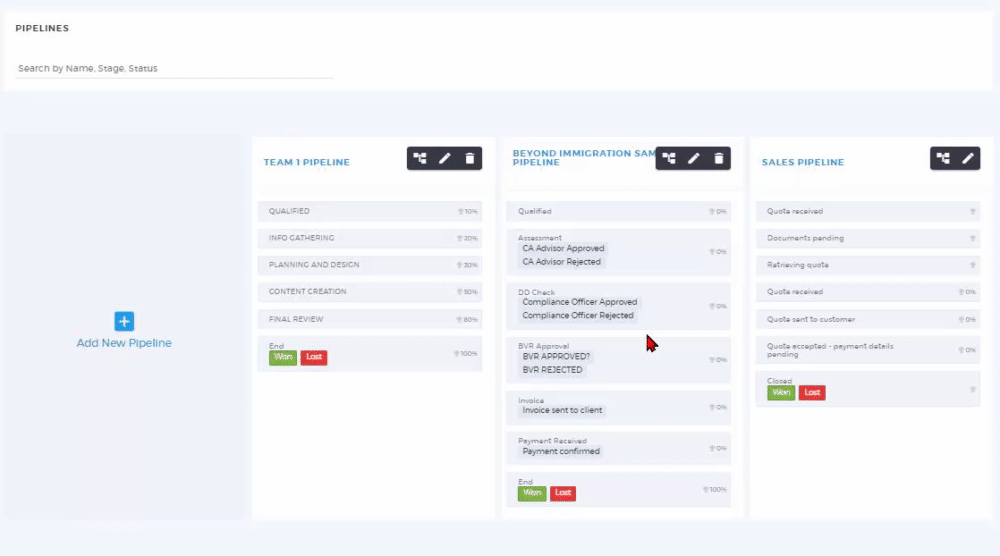
Sales Hierarchy
Organize your sales according to your business preference. It is flexible that you can use it to categorize your deals according to sectors, team hierarchy, timeline, milestones, and many more – of course, to suit your business process.
Sales Hierarchy can be initiated by creating a new pipeline or editing an existing pipeline:
1. Go to the ‘Admin’ panel. Under the ‘Sales & Marketing Menu’, click ‘Pipelines’.
2. You can create a new pipeline or edit an existing pipeline. Click the ‘Hierarchy’ tab and start setting your Sales Hierarchy.
Note that the hierarchy depends upon your business process. You can create a hierarchy according to the timeline of your deals or according to your teams, and many more. You can add a maximum of 4 layers of hierarchy.
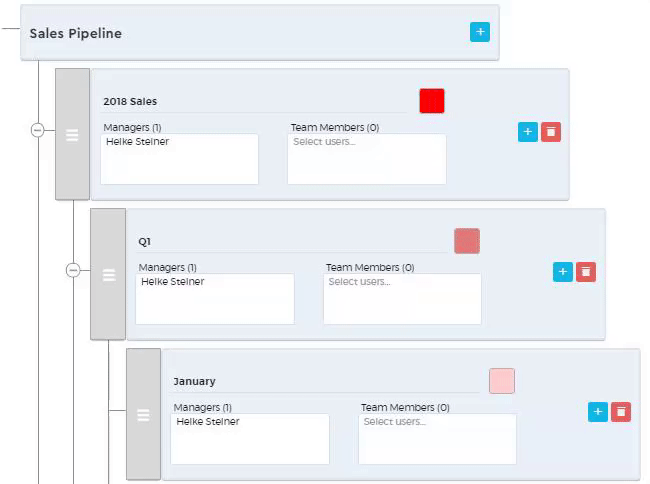
3. Name each level of your hierarchy. You can create a hierarchy according to the timeline of your deals, according to your teams, or even according to your products and services, and many more. You can treat the Sales Hierarchy as a folder and sub-folder for all your deals.

Note: You can also color-code each pipeline for easier visual identification.
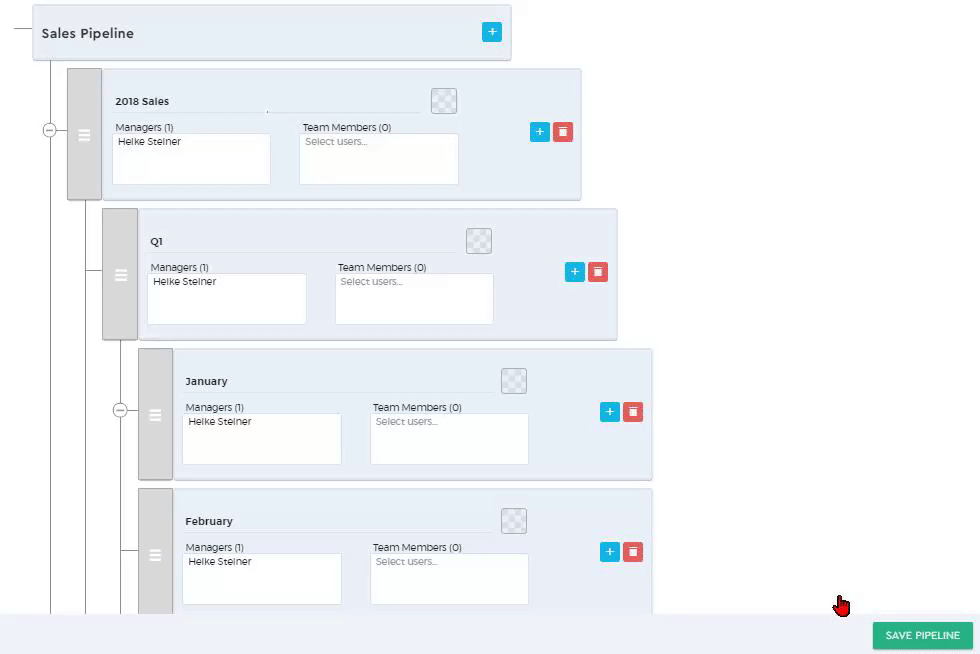
4. Assign a team member to your pipeline. When you create a pipeline, you will automatically be assigned as the manager of the pipeline.
The Manager of the pipeline can modify the settings of the pipeline (such as update and delete functions). The Team Member is only allowed to manage the deals (e.g. add and update deals).
5. Once you have set up your Hierarchy, click on