Drip Email Marketing
Re-invent your communication strategy. Create a pre-written set of content to send to customers or prospects over time using automation.
What is drip email marketing?
Drip email marketing is a feature where you can set up delay intervals between your emails for autoresponders and marketing emails.
An email drip campaign is perfect for the following reasons:
- Building your list and turning subscribers into advocates through lead nurturing campaigns.
- Giving your sign-up rate a considerable boost.
- Lowering the risk of people unsubscribing.
- Segmenting your audience into more targeted groups based on user actions.
What can you do with drip marketing?
| Top-of-mind drips | Establish constant online presence by consistently sending emails on a scheduled basis |
| Educational drips | Provide your target audience with relevant and helpful information such as sales tips, etc. |
| Re-engagement drips | Re-engage customers who you have not been in touch with for a long time |
| Competitive drips | Get your competitor’s customers to make the switch to your product or service |
| Promotional drips | Promote one of your products and services over a period |
| Training drips | Guide your readers through a training program, or explain new information to your customer |
| Announcement drips | Scheduled newsletters and announcements like feature launches, grand openings, new products, etc. |
| Reminder drips | Constant deals, documentation, expiry, renewal reminders |
| Onboarding drips | Take your customer to your onboarding process step by step |
Workflow Delay Node
Saphyte can automate the above-mentioned types of drip marketing. Here’s a quick tutorial on how you can do it in your workspace.
Note: You can only automate your drip email campaign using workflows.
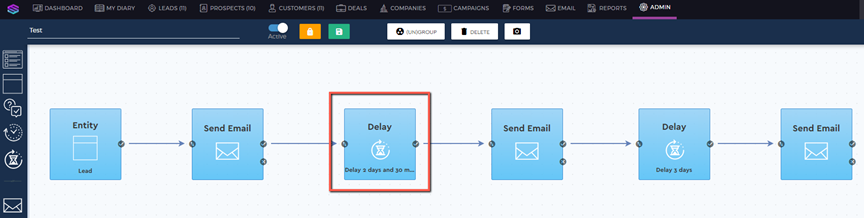
Using the delay node, you can set a condition or schedule on when your email will be sent.
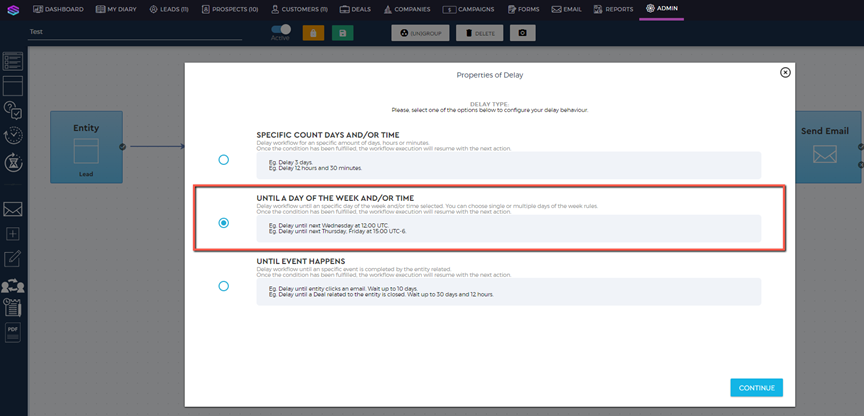
There are three settings for the delay node:
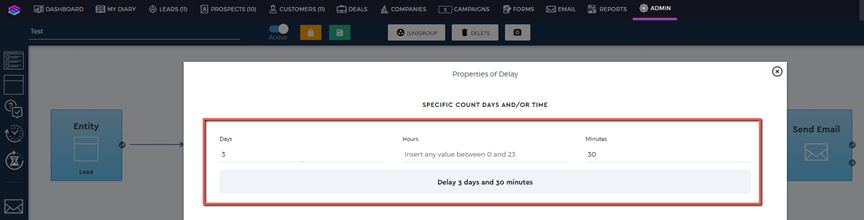
1. Specific Count Days and/or Time
This allows users to configure a delay condition on which the workflow will wait on a specific count of days, hours, or minutes before sending an email.
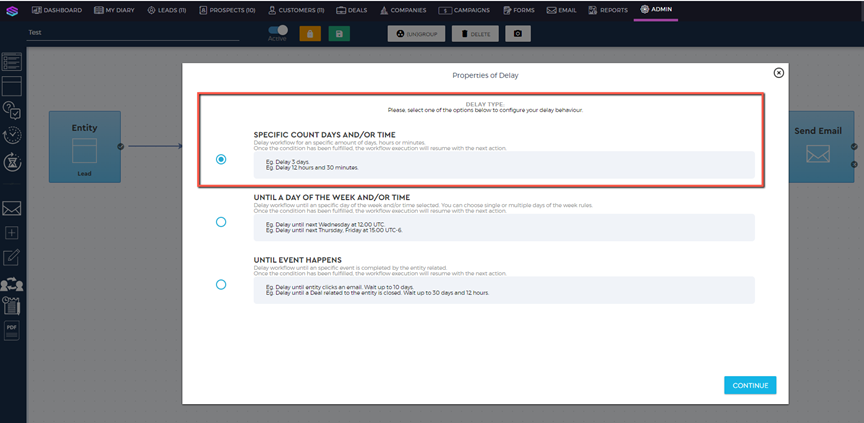
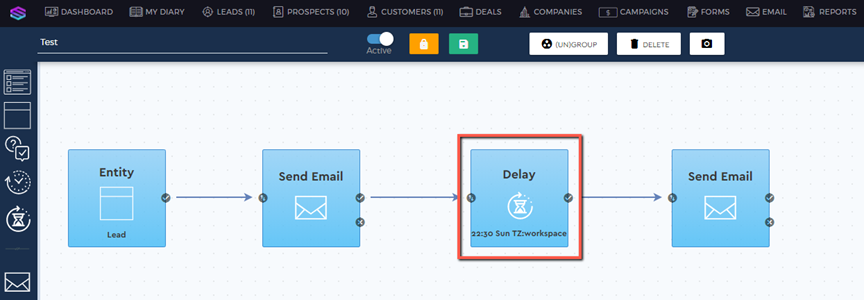
2. Until a Day of the Week and/or Time
This allows the user to set single or multiple rules on when the workflow will wait on a specific day of the week, and/or time before sending an email.
Single Rule
When delaying an email using a single rule, the user must specify at which time, timezone, and day the workflow will be executed. This means that the user only specifies a single day of the week and a single time.
When selecting the timezone, the timing will follow either the timezone of your recipients or the timezone set on your workspace.

Multiple Rules
When adding multiple rules, the mechanism works by fulfilling first the condition on the day which is closest to the current day the workflow will be executed (in a prospective manner).
For example:
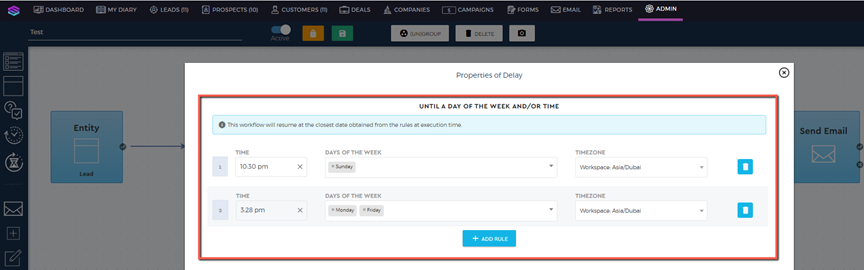
Current day: Wednesday
Condition 1: Delay at 10:30 AM on Sunday
Condition 2: Delay at 3:28 PM on Monday and Friday
Given these conditions, if the workflow is initiated on Wednesday, the client will receive the subsequent email on Friday at 3:28 PM as it was the soonest day on the rule.
3. Until the Event Happens
This allows users to configure a delay rule on which the workflow will wait for a specific event to happen (either email has been opened or clicked) before the execution will resume to the next action.

Let us break down the properties of this setting.
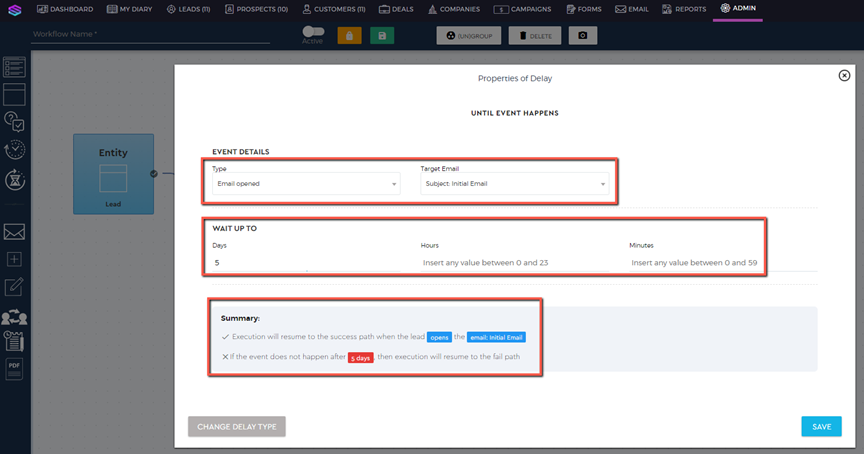
1. Type – Select the trigger event
– Email Opened
– Email Clicked
2. Target Email – Imagine that you have a long email sequence to send, having the ‘Target Email’ will serve as the identifier for the workflow to understand which email is opened or clicked so as to execute the subsequent email.
3. Wait up to – This refers to the timeframe or the count of days/hours/minutes that the workflow needs to wait until it sends the next email.
To better illustrate the use of this property, here are examples:
Sample 1: A campaign will run for 31 days from March 1-31 and will send 3 sequential emails throughout the period.
Conditions:
1. To send the initial email on March 1.
2. To send the 2nd email after opening the initial email.
3. If the email was not opened within the timeframe, send a different promotional email.
4. The emails should be sent within the month of March only.
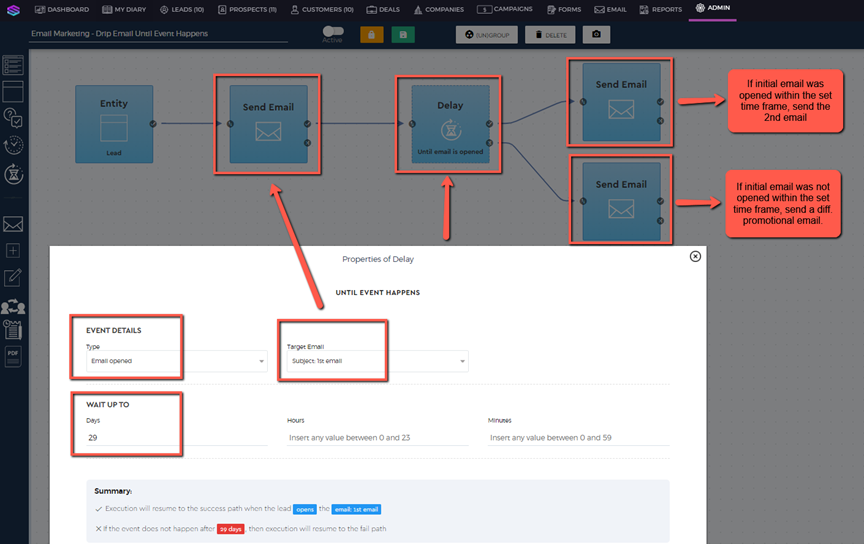
How to read the Workflow:
- March 1- the day the initial email is sent
- March 2-30 (29 days) – given timeframe to open the email
- If the client opens the email anytime within March 2-30, for example, if the initial email was opened on March 15, the 2nd email will be sent on the same day (March 15).
- In case the condition to open the initial email within March 2-30 is not fulfilled, the other promotional email will be sent on March 31.
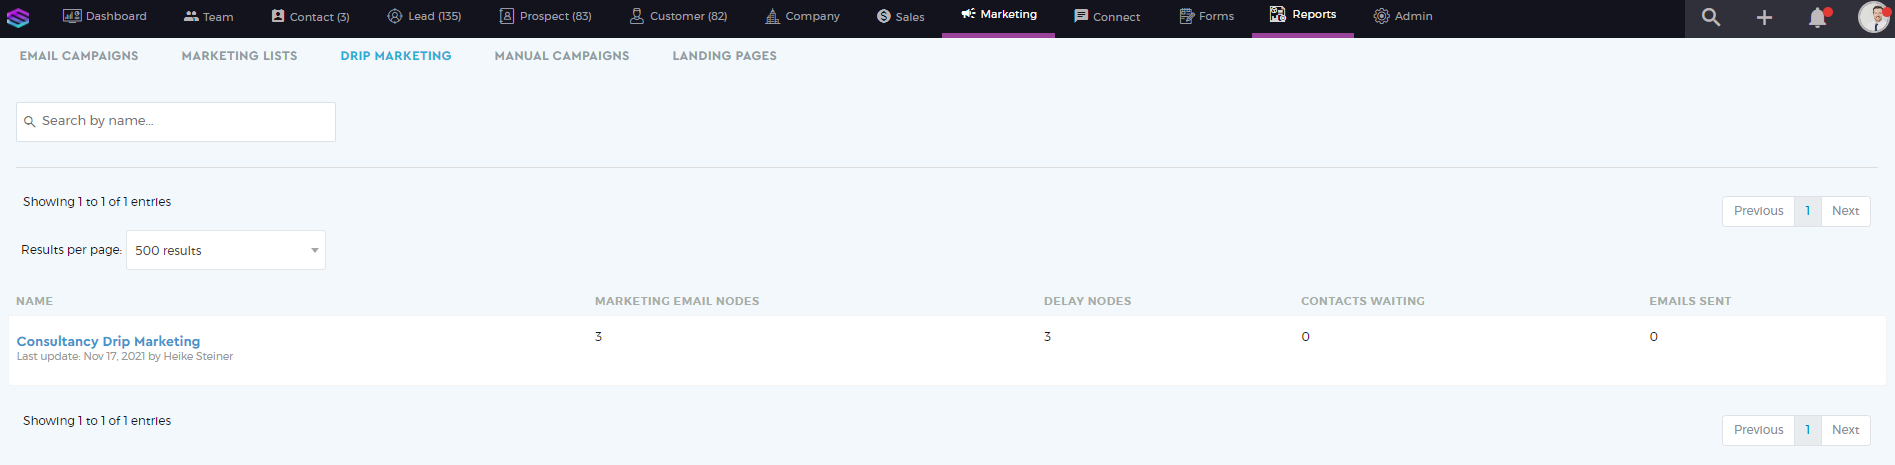
How do you generate the email analytics of Drip Marketing?
1. To be able to generate the email analytics of drip marketing, you have to set all the email workflow nodes to the ‘Marketing‘ email type.
2. Under the Marketing module, navigate to the ‘Drip Marketing‘. Any workflows that have the email marketing nodes will appear on the list. The list shows the summary of the number of email marketing nodes, number of delay nodes, number of contacts waiting, and number of emails sent.
3. Clicking the item will show you the flow of the drip marketing. It also showcases the Custom Action or Entity update which has executed the drip.

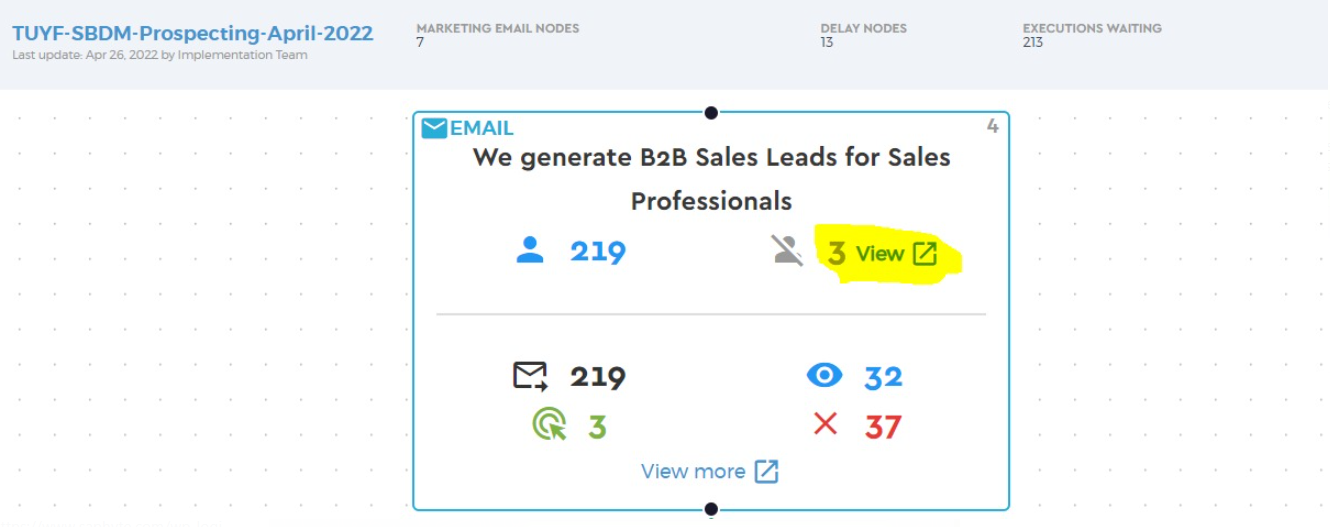
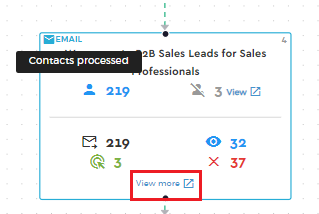
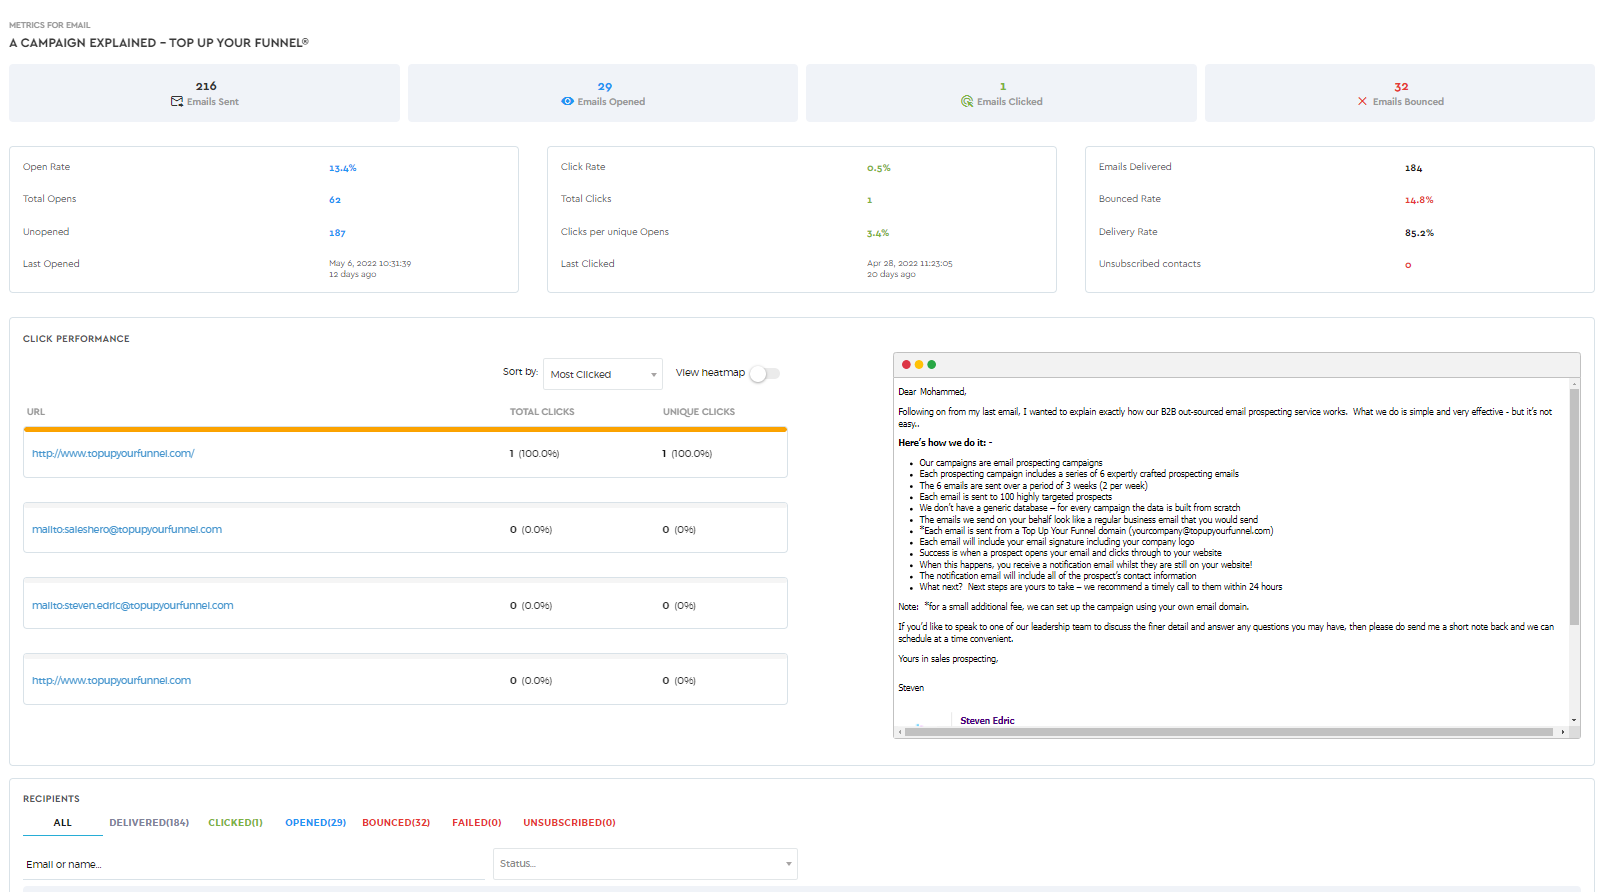
4. Clicking the View More text & Icon, it will display the analytics per email.
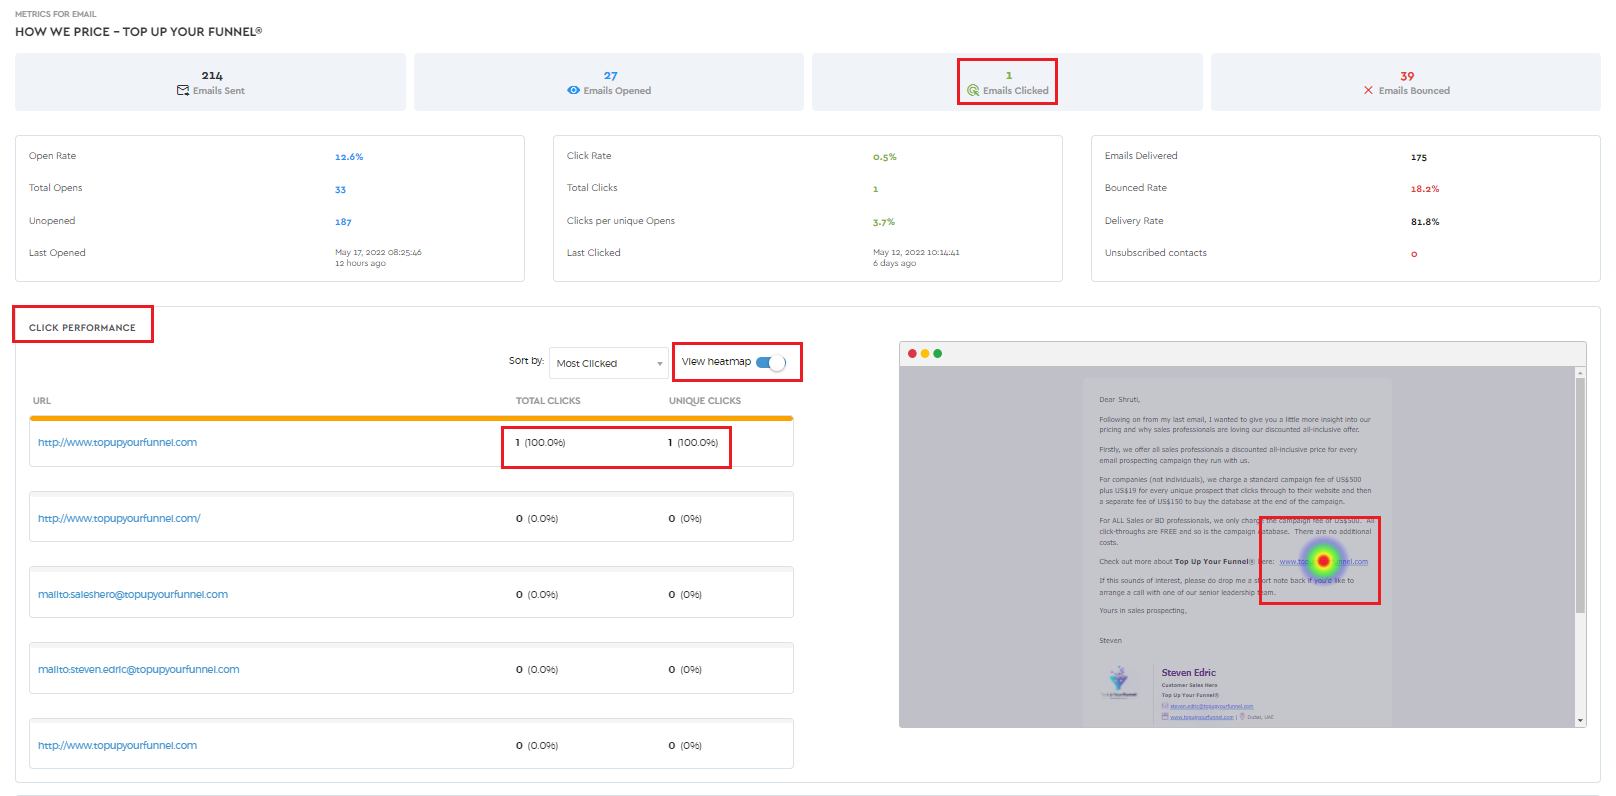
5. While enabling View heatmap, it allows us to view URLs or areas of emails being clicked by the audience. Marketing analysis also helps us to find the number of clicks for each Url in an email.
6. A few more icons represent important elements of a Drip Marketing email/Campaign as below;
 | The contact icon in blue represents, a number of contacts being processed/triggered in the Drip Marketing workflow. When you hover over the icon, it will display the message ‘Contacts Processed’ |
 | The contact icon in Grey with a cross mark represents, the number of unsubscribed contacts with an option to details of those unsubscribed contacts. |
 | The email icon represents the number of emails sent in a drip and displays the’ Email Sent’ message when you hover over the icon or number. |
 | An eye represents the total number of Drip Marketing Emails Opened by the audience. |
 | An ‘X’ Character in red represents, the total number of bounced emails in a Drip. |
 | This icon with View More/View content helps users to analyze a campaign in detail while providing access to all relevant information. |
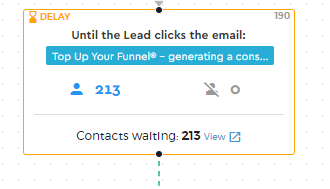
| Contacts Waiting: | Contacts Waiting are the number of Contacts waiting for the next action as configured in the Drip Marketing workflow. We can view more details while clicking the view icon next to the number. |
7. It also displays recipients’ Status for a Drip Marketing email in the Recipients section. Click for more details on analytics.

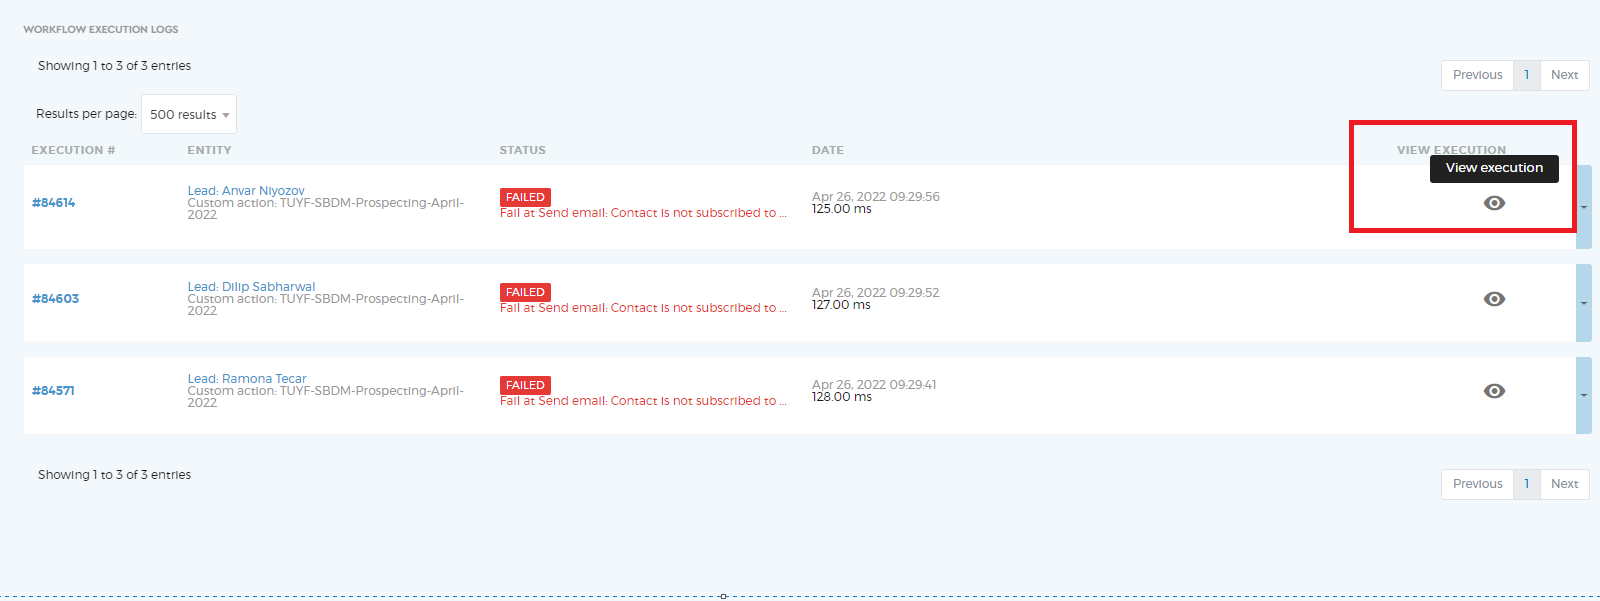
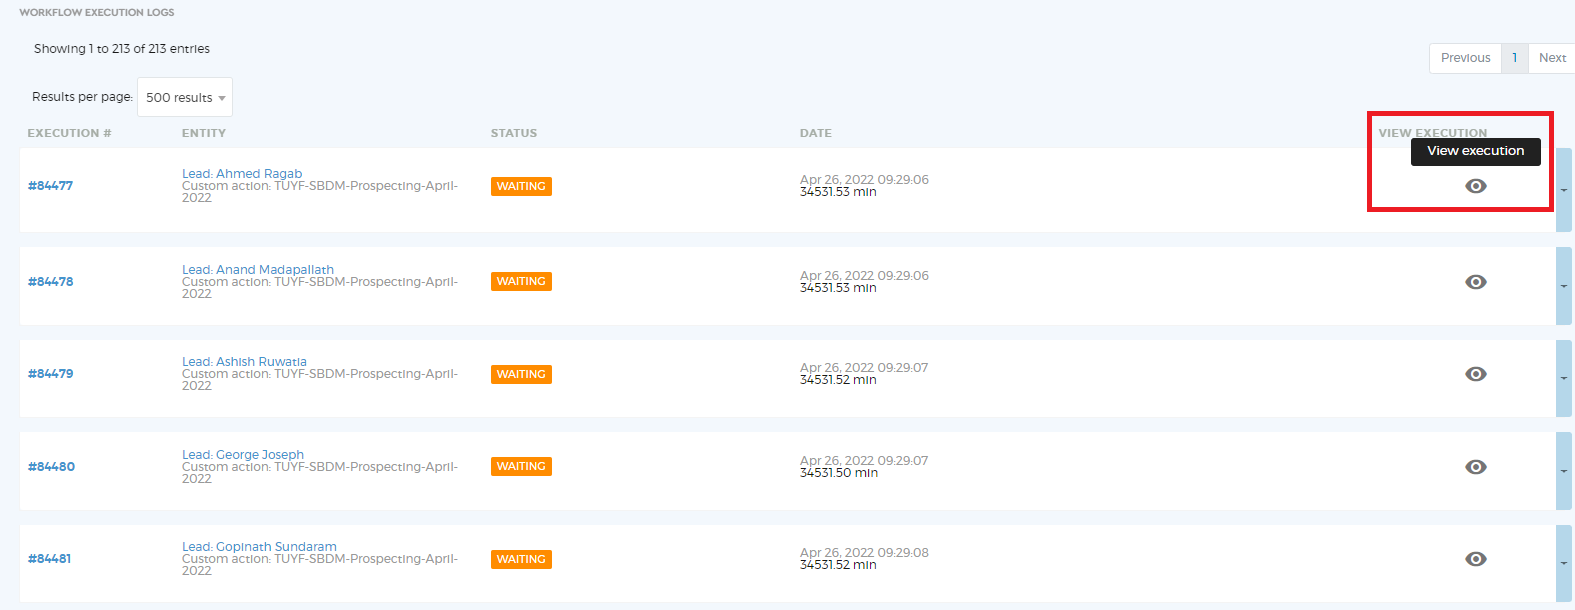
Shortcut to Workflow Logs
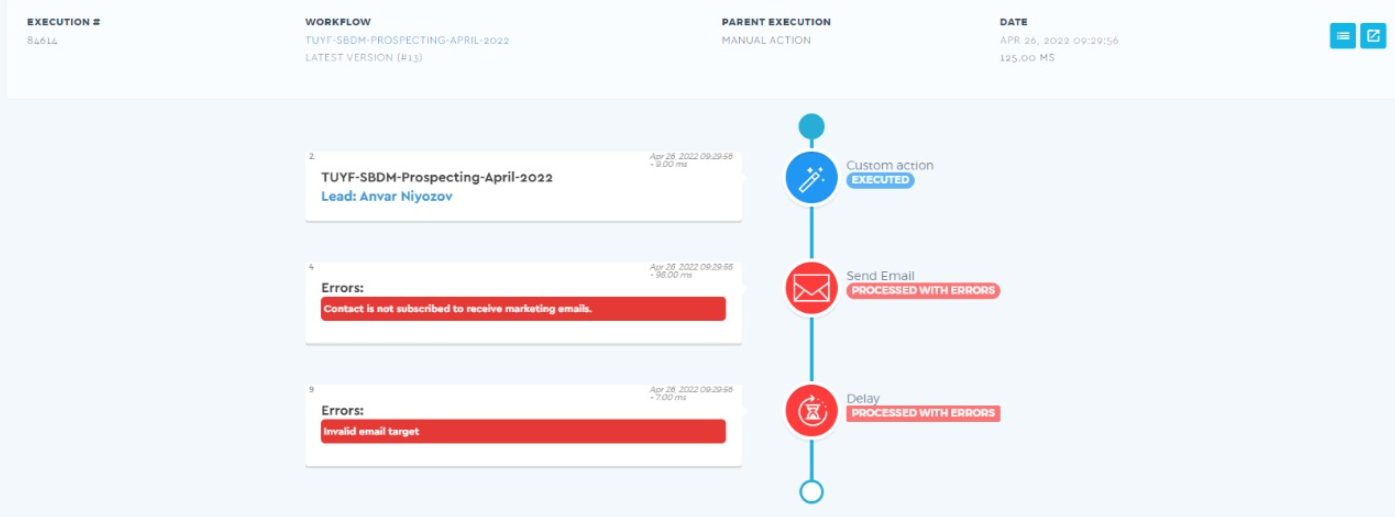
We do have a shortcut to check workflow logs for the Contacts not being processed/Contacts waiting for the next action in the workflow. We can identify the number of contacts not being processed (Unsubscribed) as well as the shortcut to workflow execution logs while clicking on the View icon and View Execution (eye icon) in the next browser.
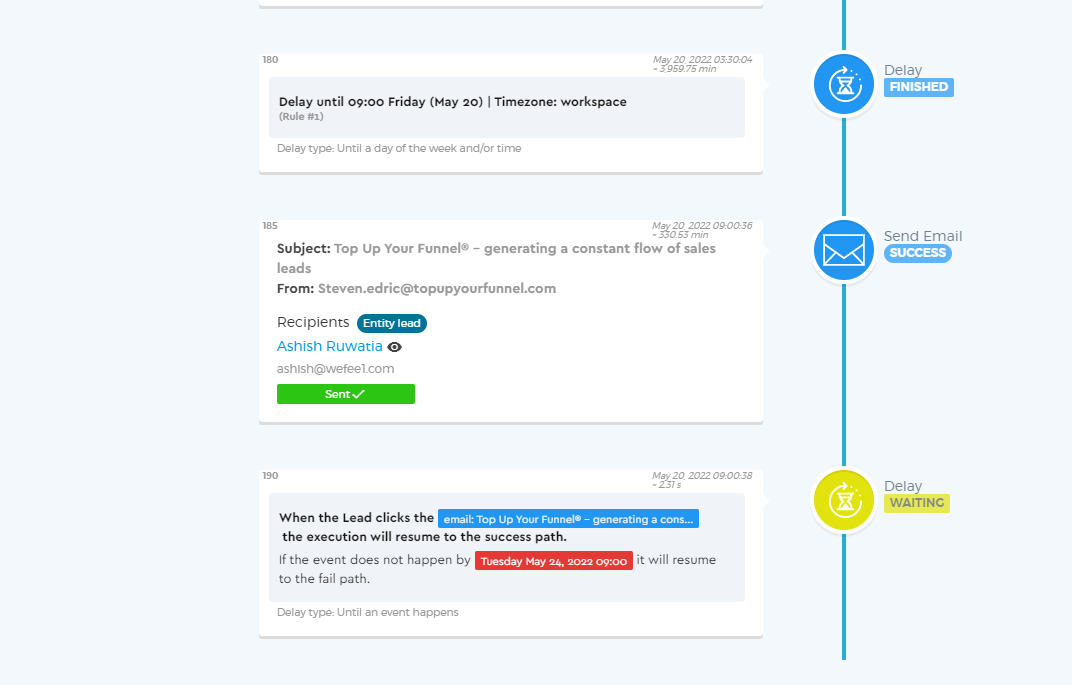
At the same time, Contacts Waiting for the next action will show up in the Delay Node, and while clicking on the View icon we can have a quick look at the workflow through the shortcut to workflow logs and check why contacts are waiting and what is the next action.