System Email Template
System Email Templates are predefined email templates used for system-generated emails. You can modify the design of the system email templates for a more professional and personalized feel.
System Email Templates settings is only available in the Enterprise plan.
To use or modify the system email templates:
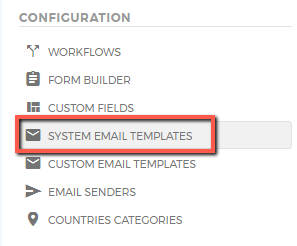
1. Go to the Admin panel.
2. Under the Configuration setting, click on ‘System Email Templates’.
The predefined system email templates are as follows:
- Contact by Email
- User Invite
- Email Verification
- Reset Password
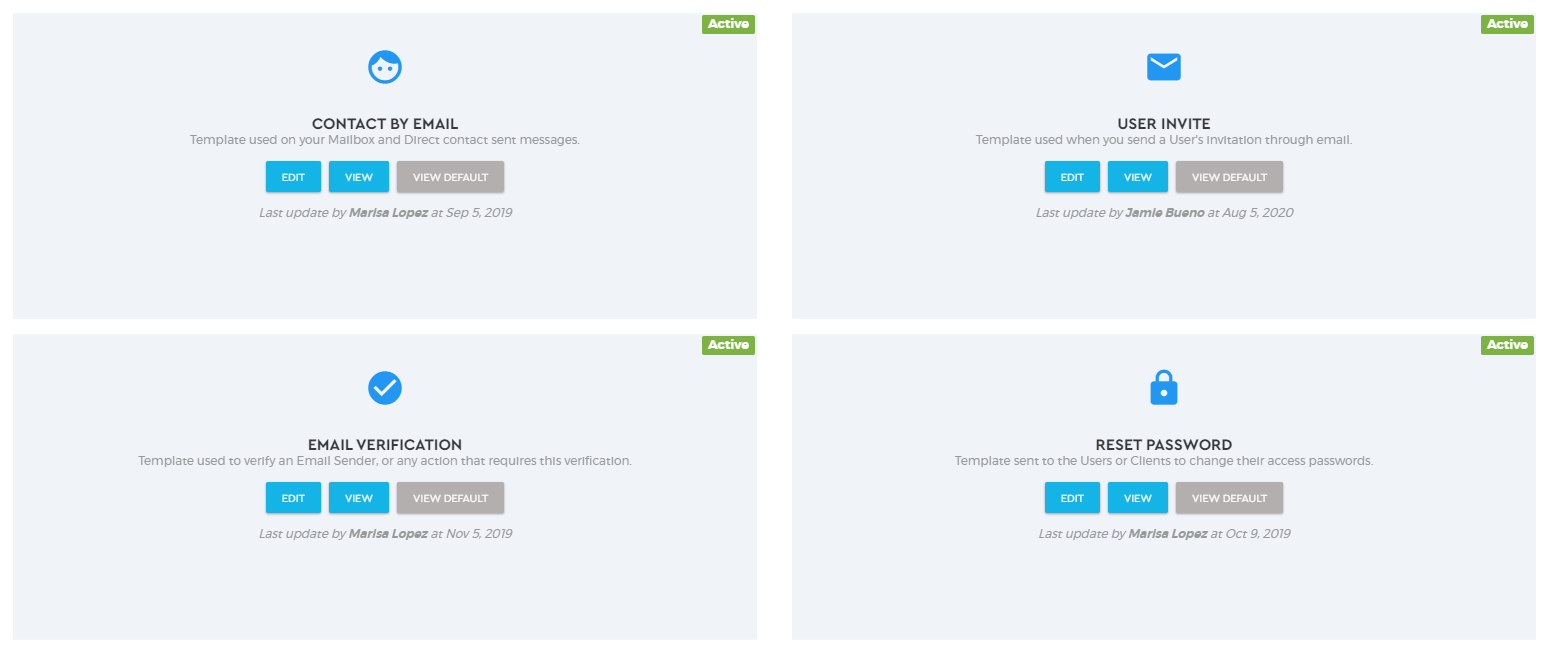
3. There are three action buttons related to managing the system email templates that you have to be familiarized with.
 | Edit the system email template according to your company’s preferences or brand design. |
 | View the system email design template that you have edited. This action button only appears once you have modified the default template. |
 | View the default system email template for the design. |
4. By default, the system email design templates bear the Saphyte design. To modify the design template, click ‘Edit’.
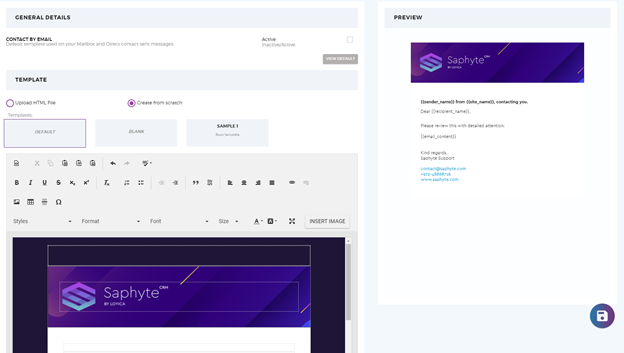
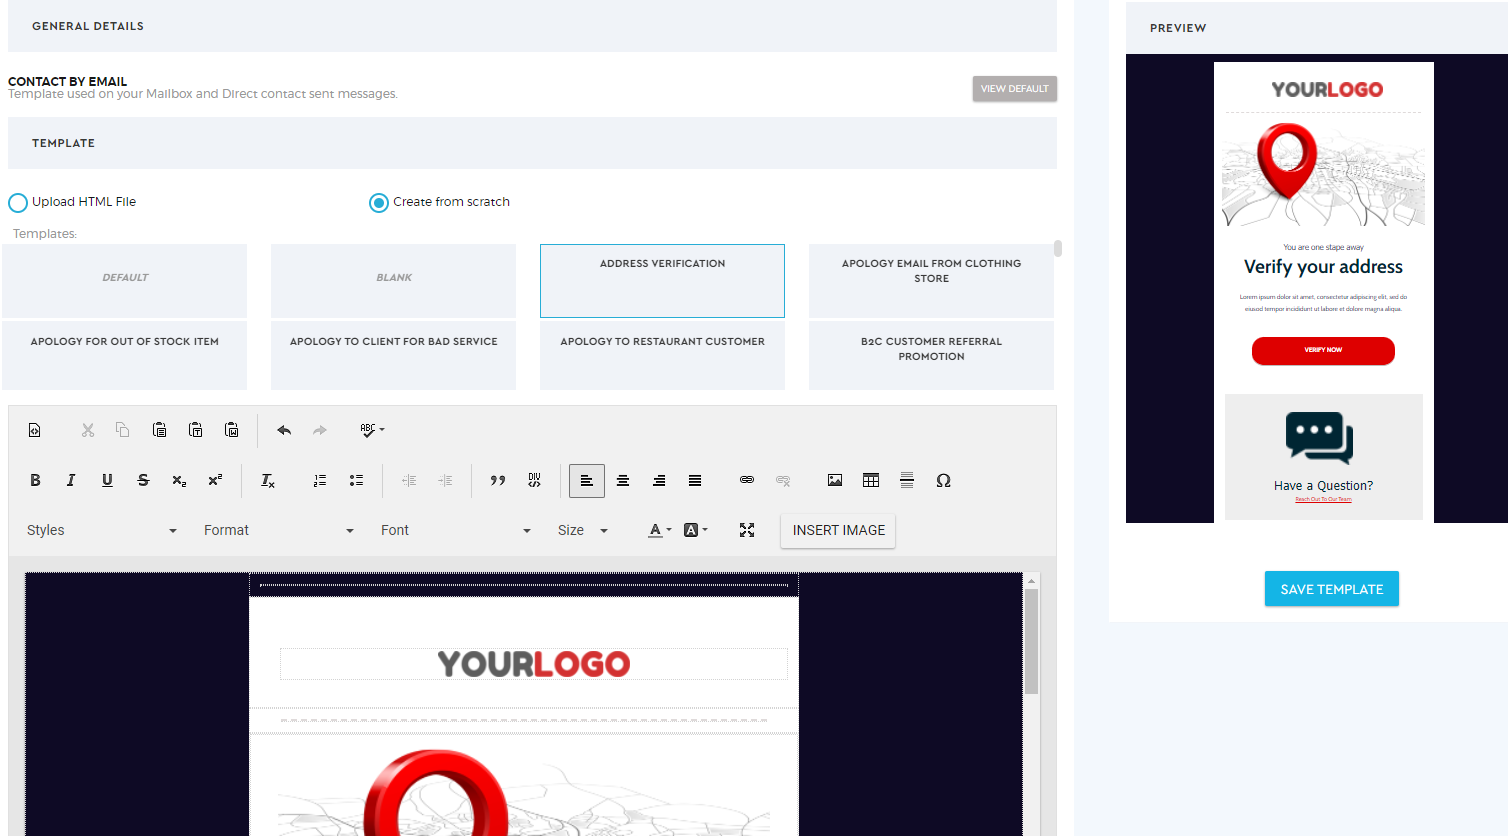
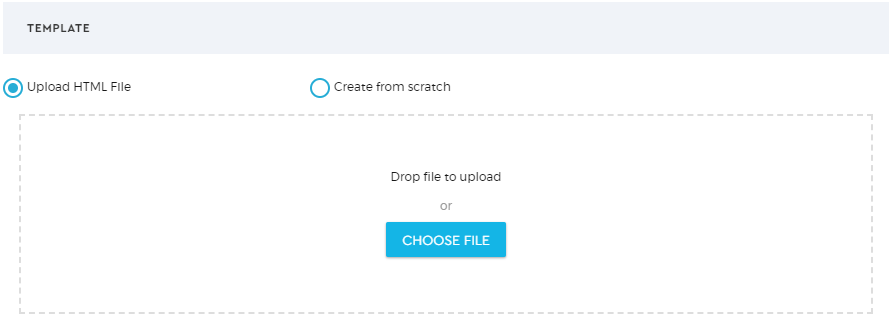
5. You have two options to edit the system email template:
- Create from Scratch – this lets you create your own template and content by clicking one of the three choices:
- Default – this is the default template in the system that contains the Saphyte design
- Blank – this lets you create your template and content completely from scratch. You can use the content editor tools to build your template.
- Custom Email Template – this is a template that includes the basic content of an email based on the type of system process. All you just have to do is edit and populate the content.
- Please refer to the steps to Configure Custom Email Templates in detail.
Every time you modify the template, you will be able to view your changes on the ‘Preview’ panel.
- Upload HTML file – if you have designed your email template using HTML, you can upload the HTML file using the drag and drop option or upload it by clicking ‘Choose File’.
6. When creating email content in Saphyte, you can set your own parameters. Parameters are variables that you can include in the content of your email template to automate the population of content based on your contacts database. Explained in Compose Email.
7. Click  once finalized.