Bulk Emails
Need to send newsletters, reminders, or transactional emails to a large group of your clients at once? Saphyte got you covered with our bulk email sending functionality.
How can I send bulk emails to my contacts list?
There are few ways you can do it in Saphyte.
Direct Contact
To contact or send a bulk email to a large group of clients all at the same time, please follow the below steps:
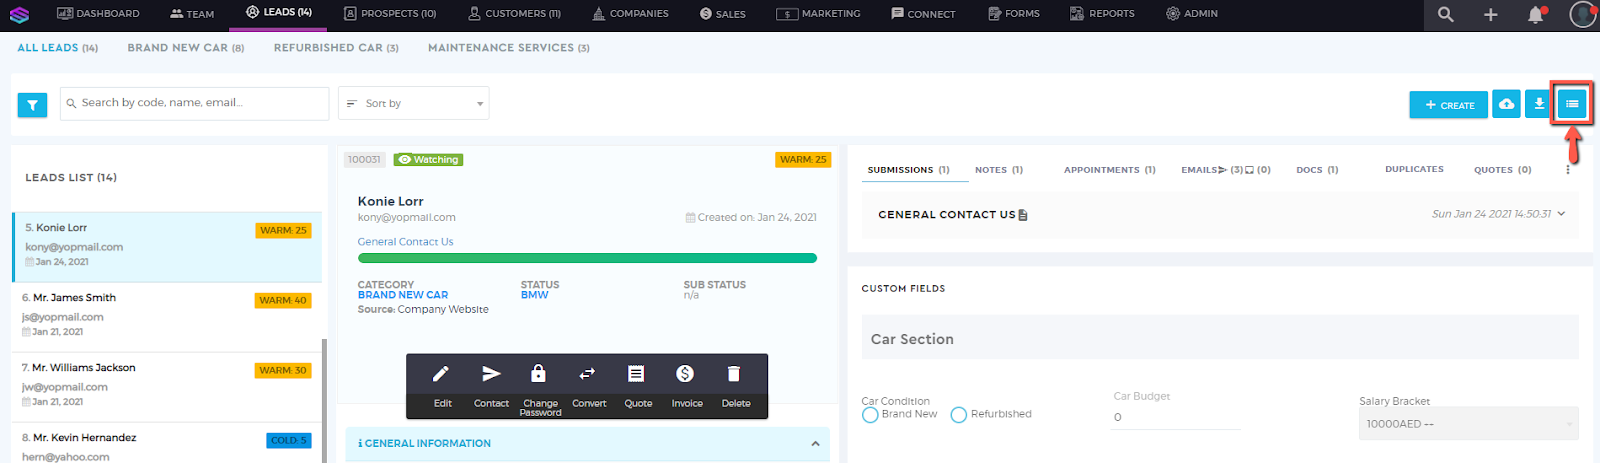
1. On the client section (leads/prospects/customers), change the layout view of the entity list by clicking the ‘List View’ icon 
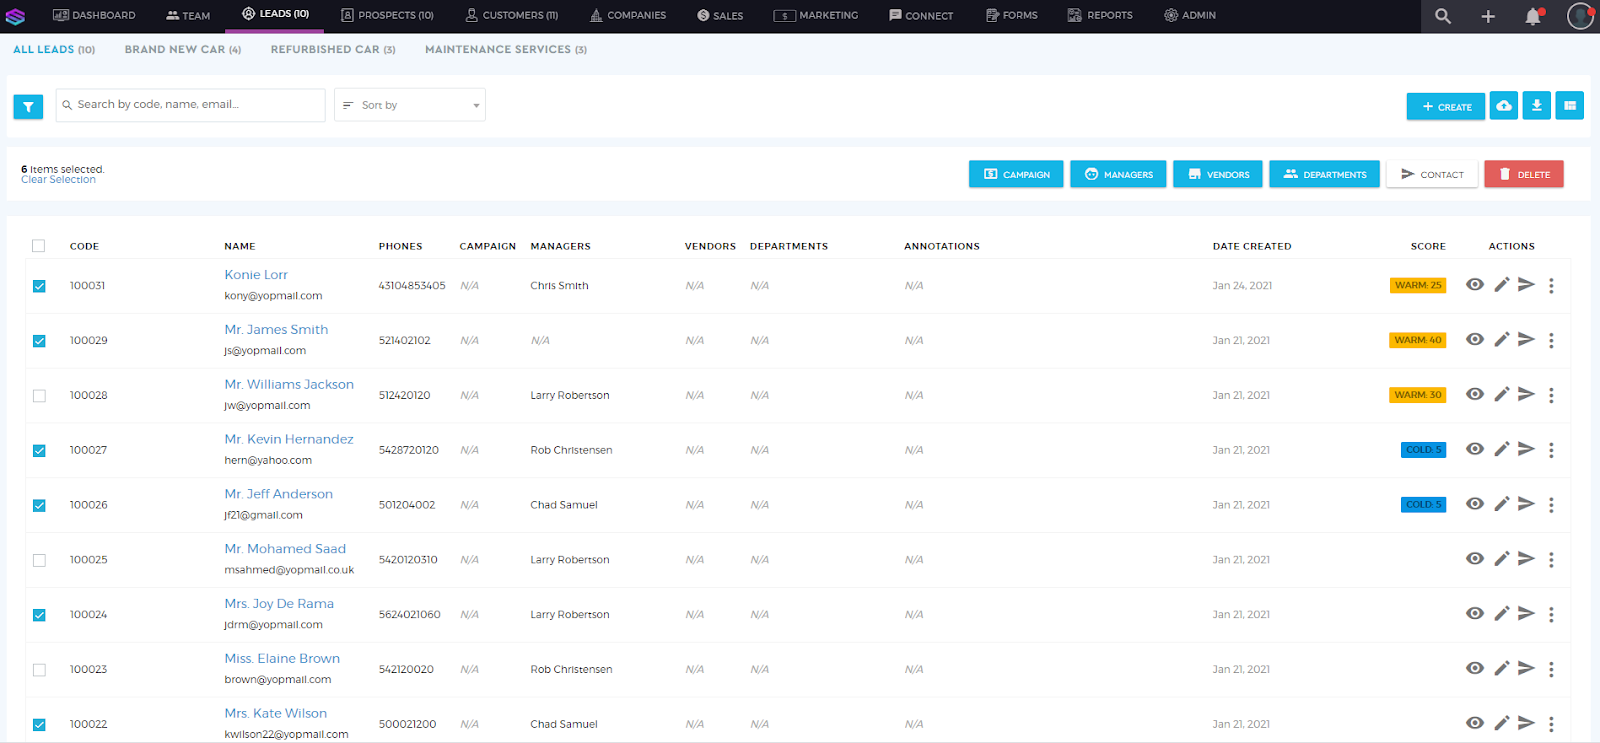
2. Your view will change from the section layout into the list layout. Tick the boxes of the contacts you want to send an email to. You can also use the filter option for easier segmentation.
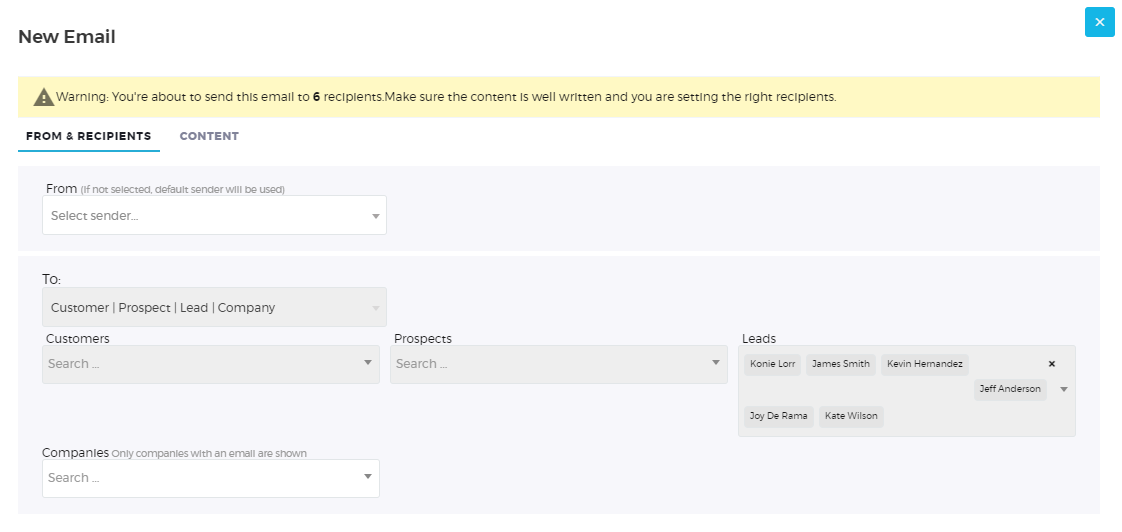
3. Click ‘Contact’  and a pop-up window ‘New Email‘ will appear where you can manage your email recipients and email content.
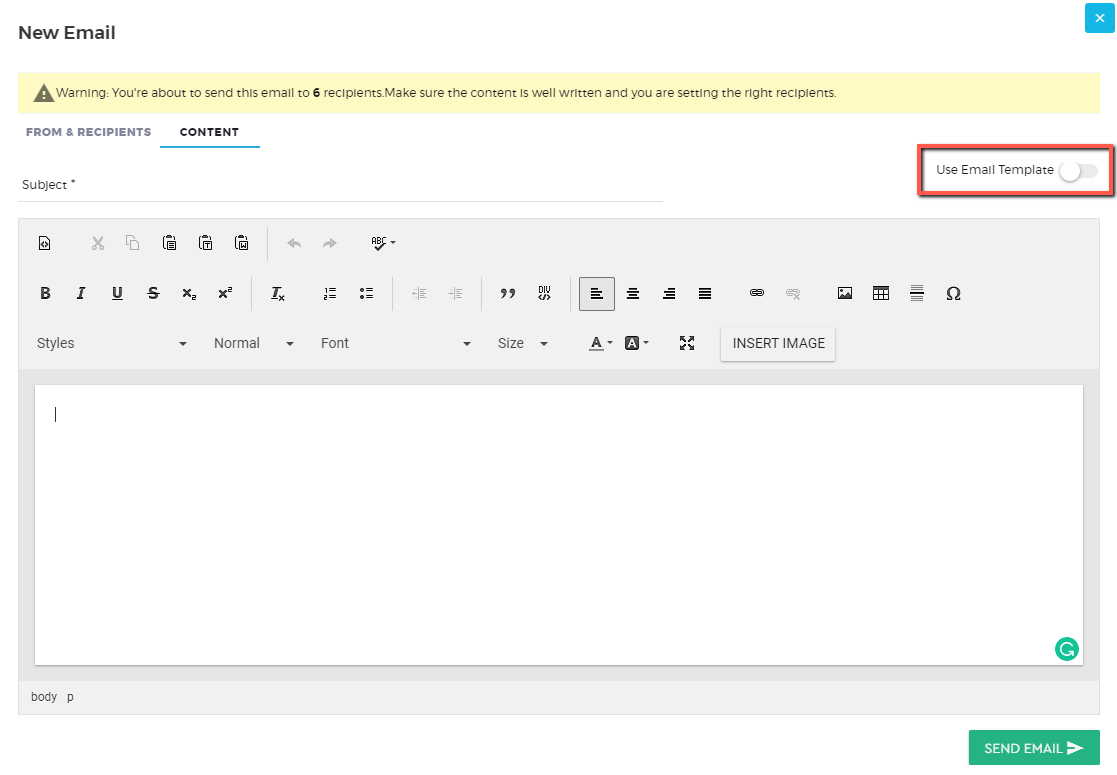
4. Click on the ‘Content‘ tab to add your email content. You can either create it from scratch or use a Custom Email Template that you have stored in your workspace. To know more about how to compose your email in Saphyte, you can refer to this tutorial.
5. Once the details are finalized, click ‘Send Email’ 
Mailbox
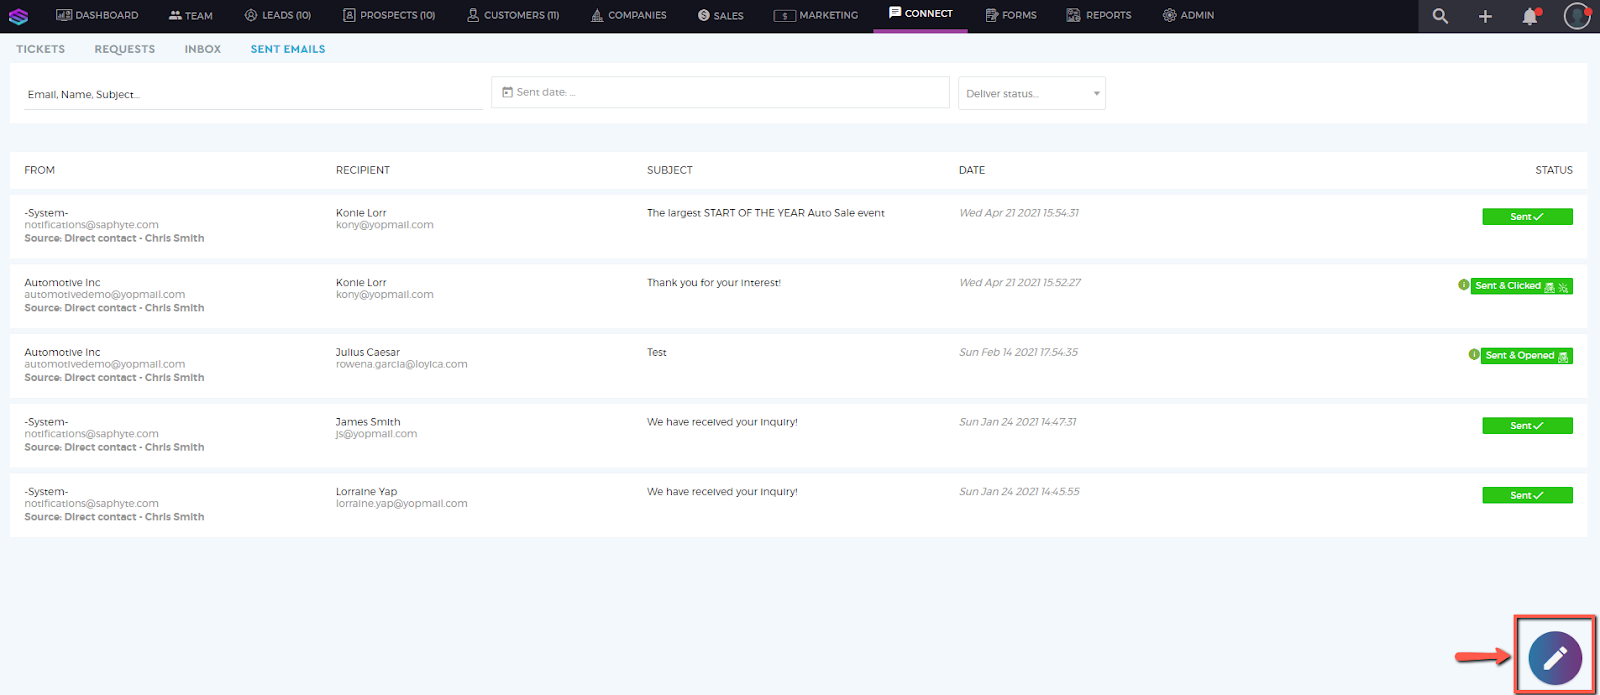
1. On the menu bar, navigate to ‘Connect’ tab.

2. Click on ‘Sent Emails’.

3. Click on the pencil icon  located at the lower right corner of the screen.
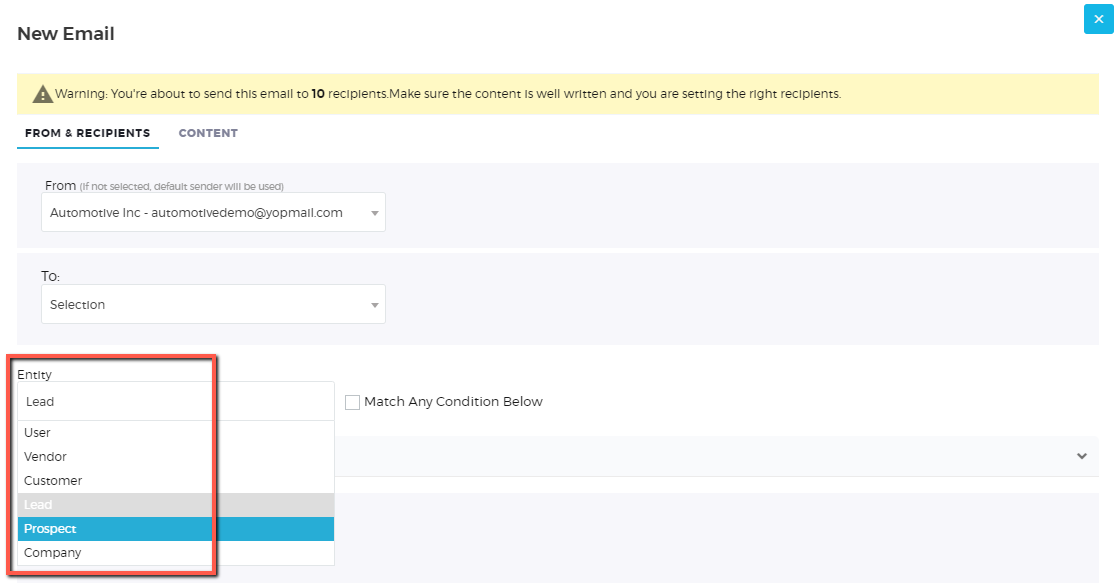
4. A pop-up window ‘New Email‘ will appear where you can manage your email recipients and email content.
5. On the ‘From’ field, select your email sender.
6. On the ‘To’ field, select ‘Selection’. Select your target recipients from the ‘Entity’ field.
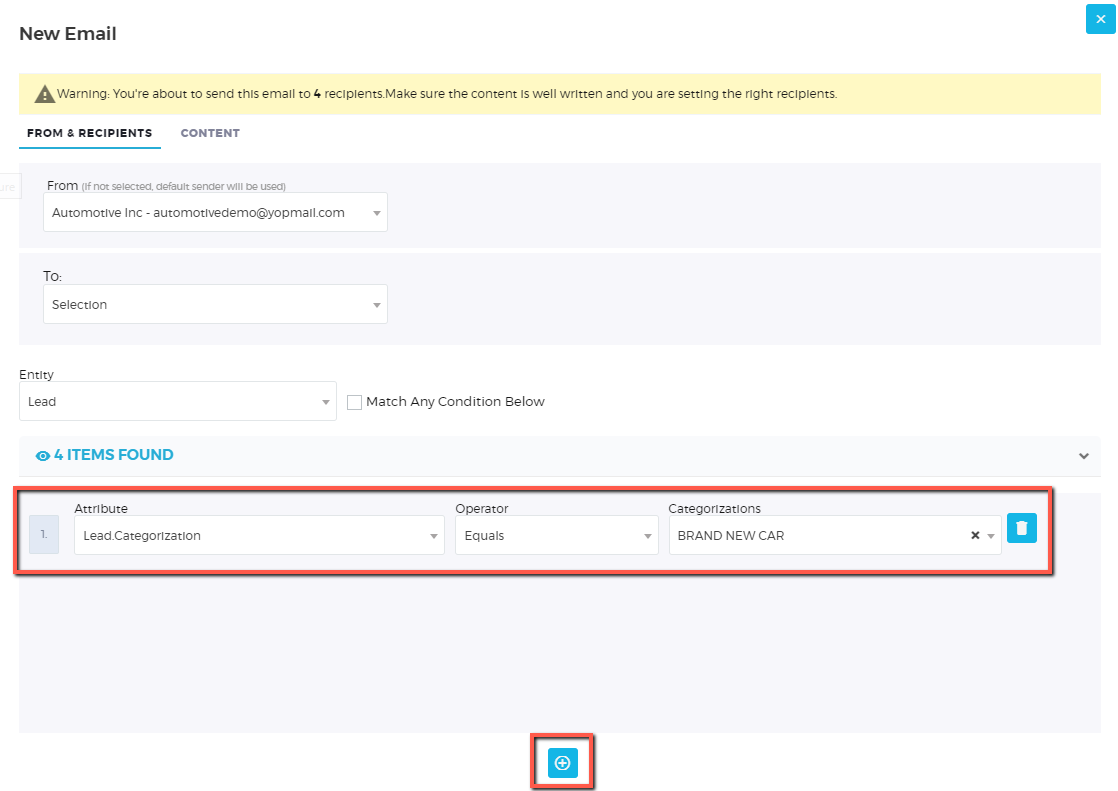
7. To send email to targeted recipients, add a condition by clicking  . Please refer to the screenshot below:
8. Click on the ‘Content‘ tab to add your email content. You can either create it from scratch or use a Custom Email Template that you have stored in your workspace. To know more about how to compose your email in Saphyte, you can refer to this tutorial.
9. Once the details are finalized, click ‘Send Email’
Workflow
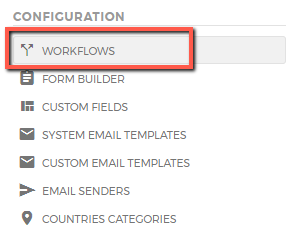
1. Click on Admin tab –> Configuration Section –> Workflows.
2. Click on the ‘Create’  located on the upper right corner of the screen.

3. Create a schedule automation or drip marketing to deploy your bulk emails. You can refer to the Schedule Automation tutorial for more details.

4. Once all set, activate the workflow by clicking the slider button and then click ‘Save‘  . Hence, the workflow will run and send the email to all the defined recipients on the set schedule.